
How to setup PaperCut Groups to sync with MyPC Groups
2. Set Up Groups for On-Demand Group Sync
By default, only a nightly/manual Papercut sync would group a user. To group them with on-demand creation, set up New User Settings in the groups you want to configure.
Log in to the PaperCut Admin portal.
Navigate to Groups tab.
Select the Group you want to configure this for in the Groups List.
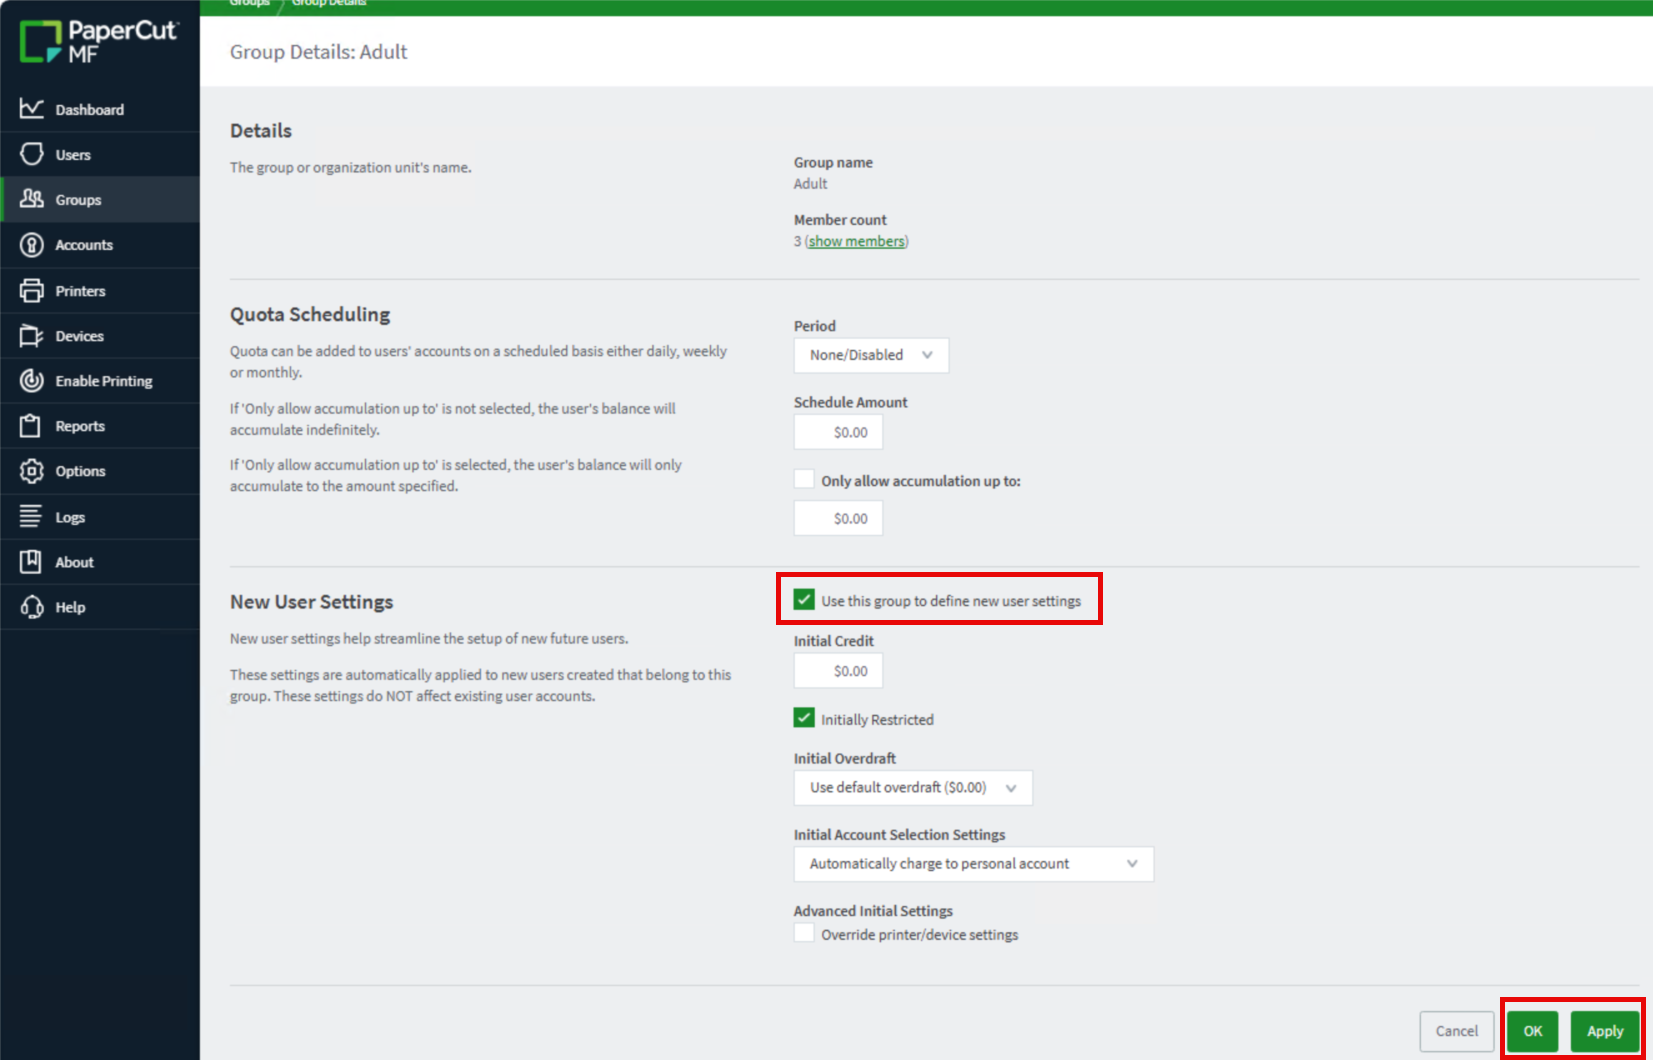
Under Group Details, scroll to the New User Settings section and check the box "Use this group to define new user settings".
Click APPLY and OK. This will now add any NEW user to this group if they belong to it in Cire.
3. Set Up Quota for Groups
If you are setting up groups to allow Quotas, the next step is to enable Quota Scheduling and Configure the Initial Credit.
-
Under the same Groups tab, select the group you want to configure this for in the Groups List.
-
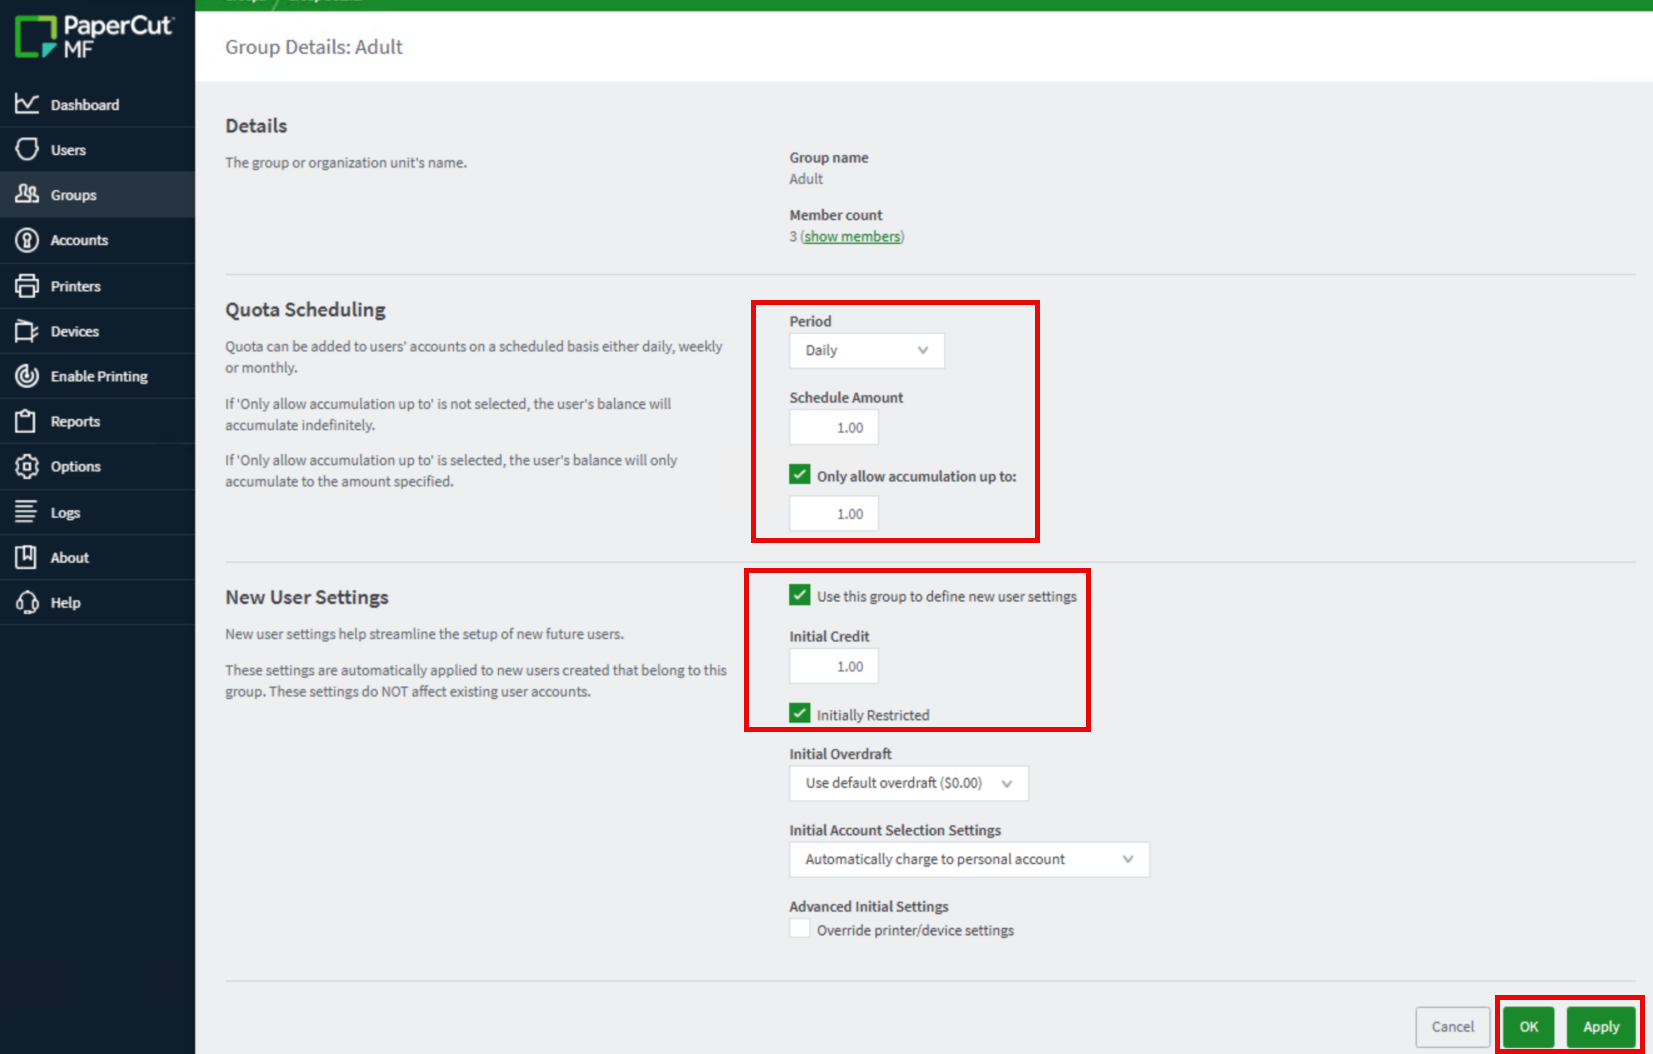
Quota Scheduling: Change the "Period" dropdown to how often you want the quota to be reset.
Set Schedule Amount to the amount you want the quota to reset to.
Enable Only allow accumulation up to and set the value. This stops the quota from adding the amount every day even if they don't use it. (Use it or lose it concept)
-
New User Settings: If not already enabled in the configuration above, check "Use this group to define new user settings".
Set the Initial Credit amount you want to give new user accounts. This should match the Schedule Amount, in theory.
Check the box to enable Initially Restricted. This prevents users from going below $0.00.
Click Apply and OK.
-
This article provides step-by-step instructions on how to configure and troubleshoot PaperCut user accounts to ensure they are properly grouped with MyPC Groups via Cire. Proper group synchronization is essential for managing user quotas and permissions within PaperCut, particularly when applying quotas to specific groups or to all groups except Guests.
Prerequisites
Cire version 5.6.0.5 or higher installed
PaperCut version 23 or higher installed
Cire Remote PaperCut Integration Tool version 6.0.0.0 or higher installed
If the required versions are installed but not yet configured for user account creation, refer to How to setup PaperCut to sync with MyPC/Cire for user creation before proceeding.
Configuring PaperCut Groups
1. Set Up Groups for User Synchronization
Log in to the PaperCut Admin portal.
Navigate to the Groups tab.
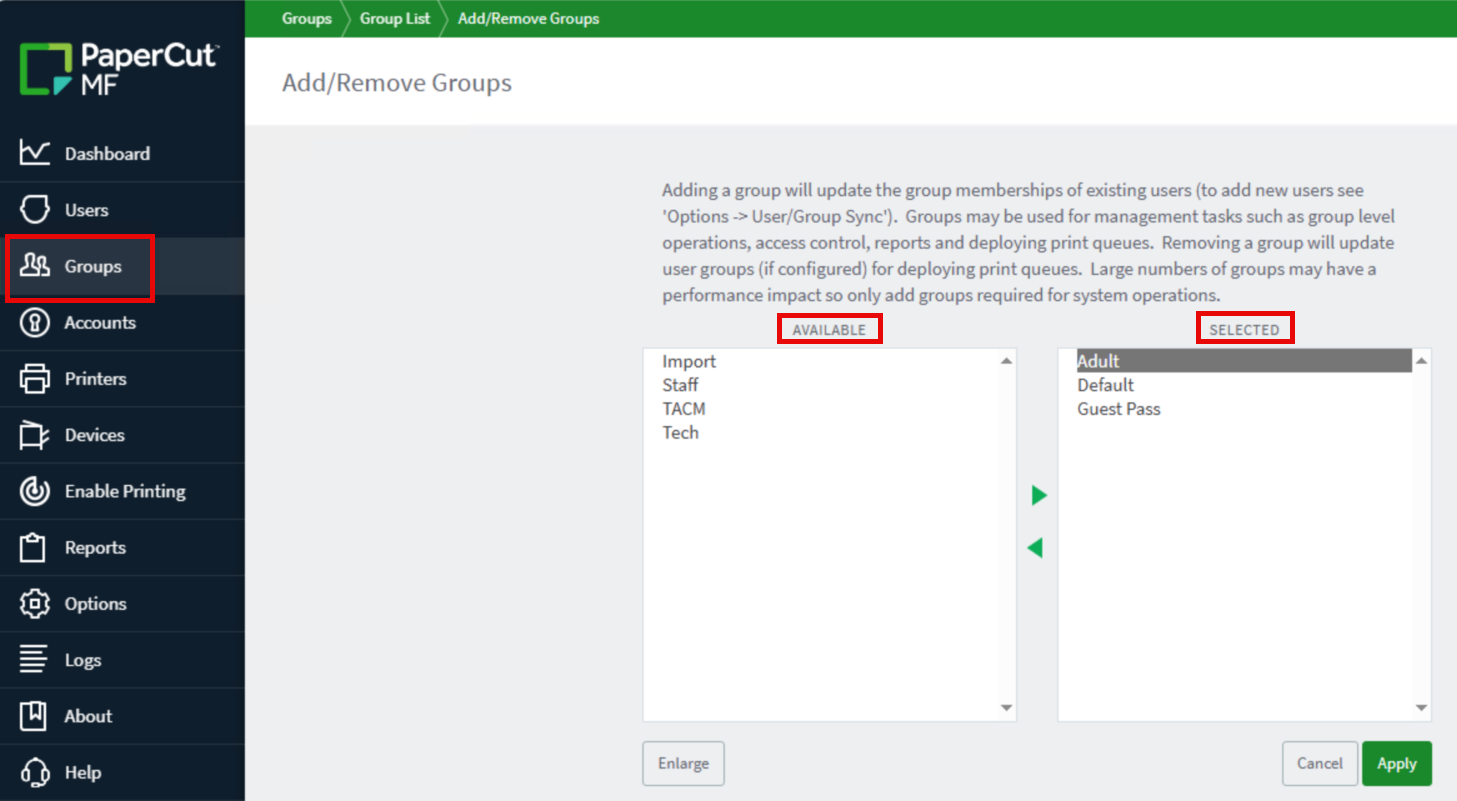
Click the Add/Remove Groups button at the bottom-right of the Group List window.
-
In the window that appears:
The left pane displays available groups from Cire.
If no groups appear or you receive an error, verify that the Cire-PaperCut Integration Tool is correctly set up (see Prerequisites).
Select the groups you wish to sync. Use the arrow buttons (< and >) to move groups between the available and selected panes. You can select one, multiple, or all groups.
Click APPLY.
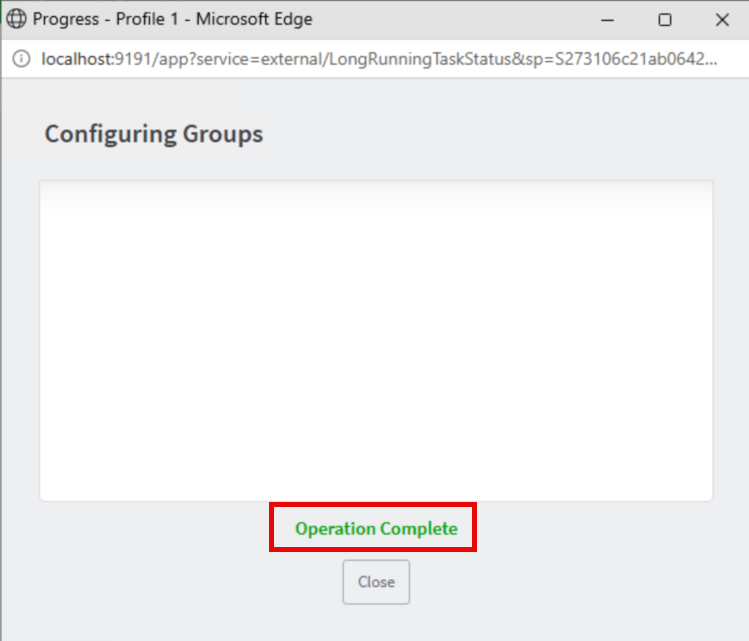
A progress window will appear while the system imports the groups and moves PaperCut user accounts into the corresponding groups based on Cire data.
-
Once complete, verify correct group assignment:
Go to the Users tab.
Select a user account that you know is grouped correctly in Cire.
Scroll to the bottom of the User Details page to confirm the user’s group membership.
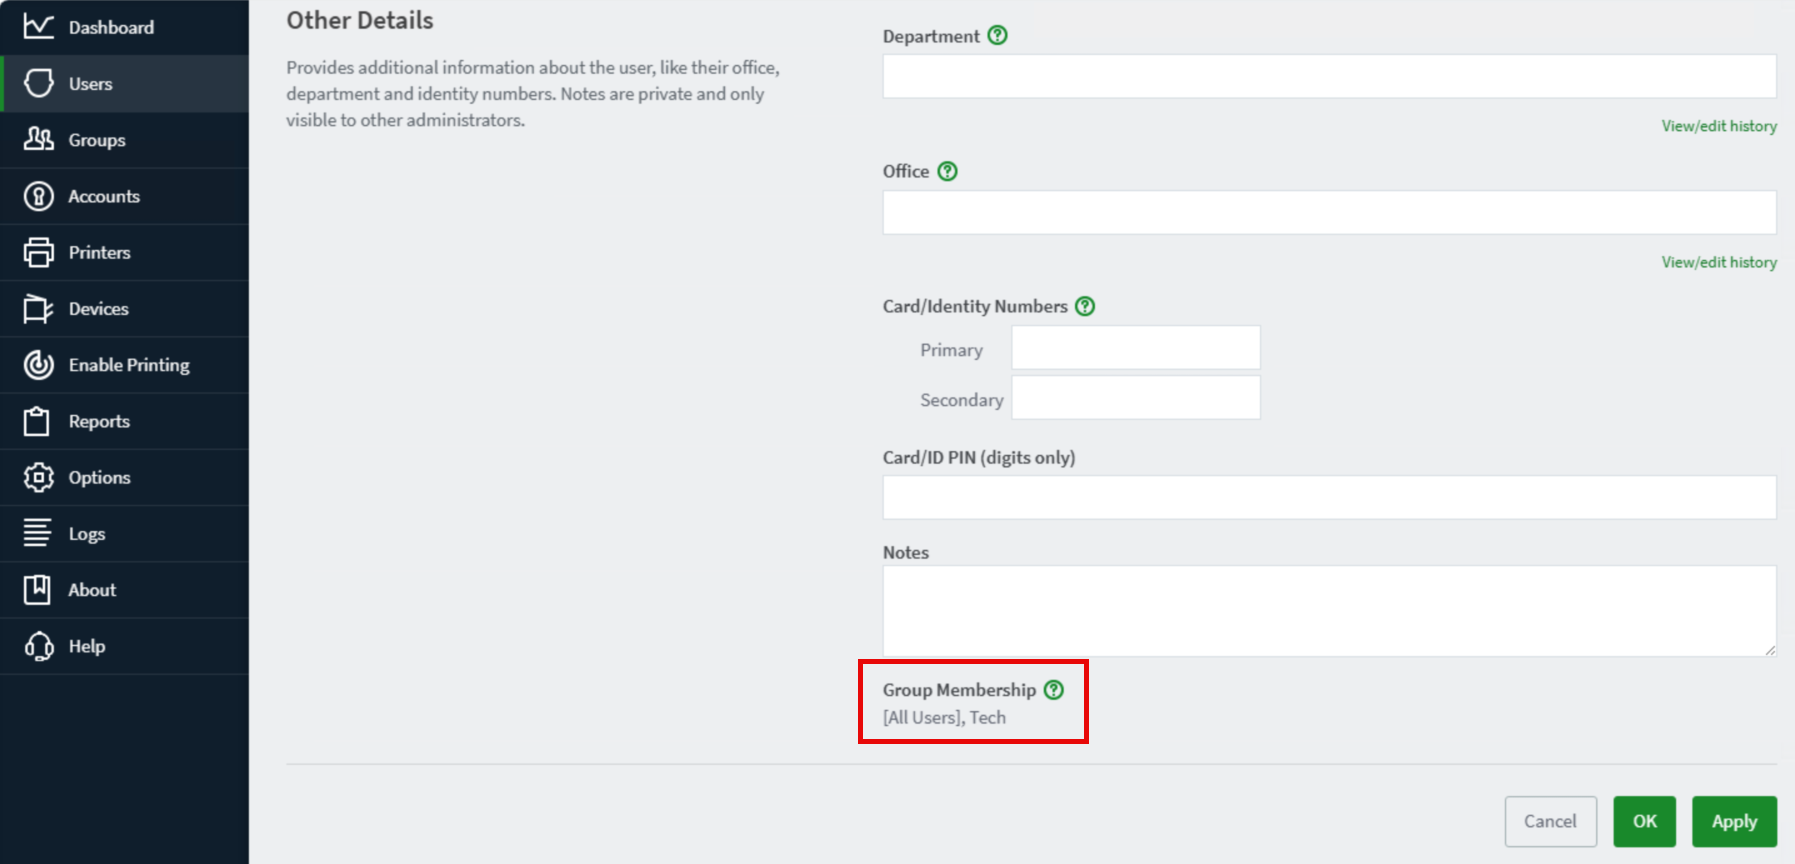
2. Set Up Groups for On-Demand Group Sync
By default, PaperCut groups users during nightly or manual syncs. To enable on-demand group assignment when new users are created, configure New User Settings for the desired groups.
Log in to the PaperCut Admin portal.
Navigate to the Groups tab.
Select the group you want to configure from the Groups List.
In Group Details, scroll to the New User Settings section.
Check the box labeled Use this group to define new user settings.
Click APPLY and OK.
With this setting, any new user who belongs to the group in Cire will be immediately added to this group in PaperCut upon account creation.
3. Set Up Quota for Groups
To manage print quotas for groups, enable quota scheduling and configure initial credit allocations.
In the Groups tab, select the relevant group from the Groups List.
-
Under Quota Scheduling:
Set the Period dropdown to the desired quota-reset frequency (e.g., daily, weekly, monthly).
Set Schedule Amount to the quota value to allocate per period.
Enable Only allow accumulation up to and specify a value if you want to prevent unused quota from accumulating beyond a certain amount.
-
In New User Settings (if not already enabled):
Check Use this group to define new user settings.
Set the Initial Credit to match the schedule amount, if desired.
Check Initially Restricted to prevent users from having a negative balance.
Click Apply, then OK, to save your changes.
Troubleshooting Tips
If groups do not appear or sync correctly, verify that all prerequisites are installed and configured properly.
-
Check the Cire-PaperCut Integration Tool settings if you encounter errors during group import using the KB Articles below.
Always verify user group membership in PaperCut after making changes to ensure synchronization is working.
By following these procedures, you can ensure that PaperCut user accounts are correctly grouped with MyPC Groups, enabling effective quota management and streamlined user administration.