
How to setup PaperCut to sync with MyPC/Cire for user creation
This article provides step-by-step instructions for integrating PaperCut with Cire Sync to synchronize user accounts. Follow these steps to configure the integration and ensure proper synchronization between the two systems. This is needed to create the 'pc-client' account (PaperCut PC Client), group users, and set quotas in PaperCut.
Prerequisites
Cire version 5.6.0.5 or higher installed
PaperCut version 23 or higher installed
Cire Remote PaperCut Integration Tool version 6.0.0.0 or higher installed (note the installation directory for later steps)
Configure PaperCut for Cire Integration
1. Set Up User/Group Synchronization
Log in to the PaperCut Admin portal.
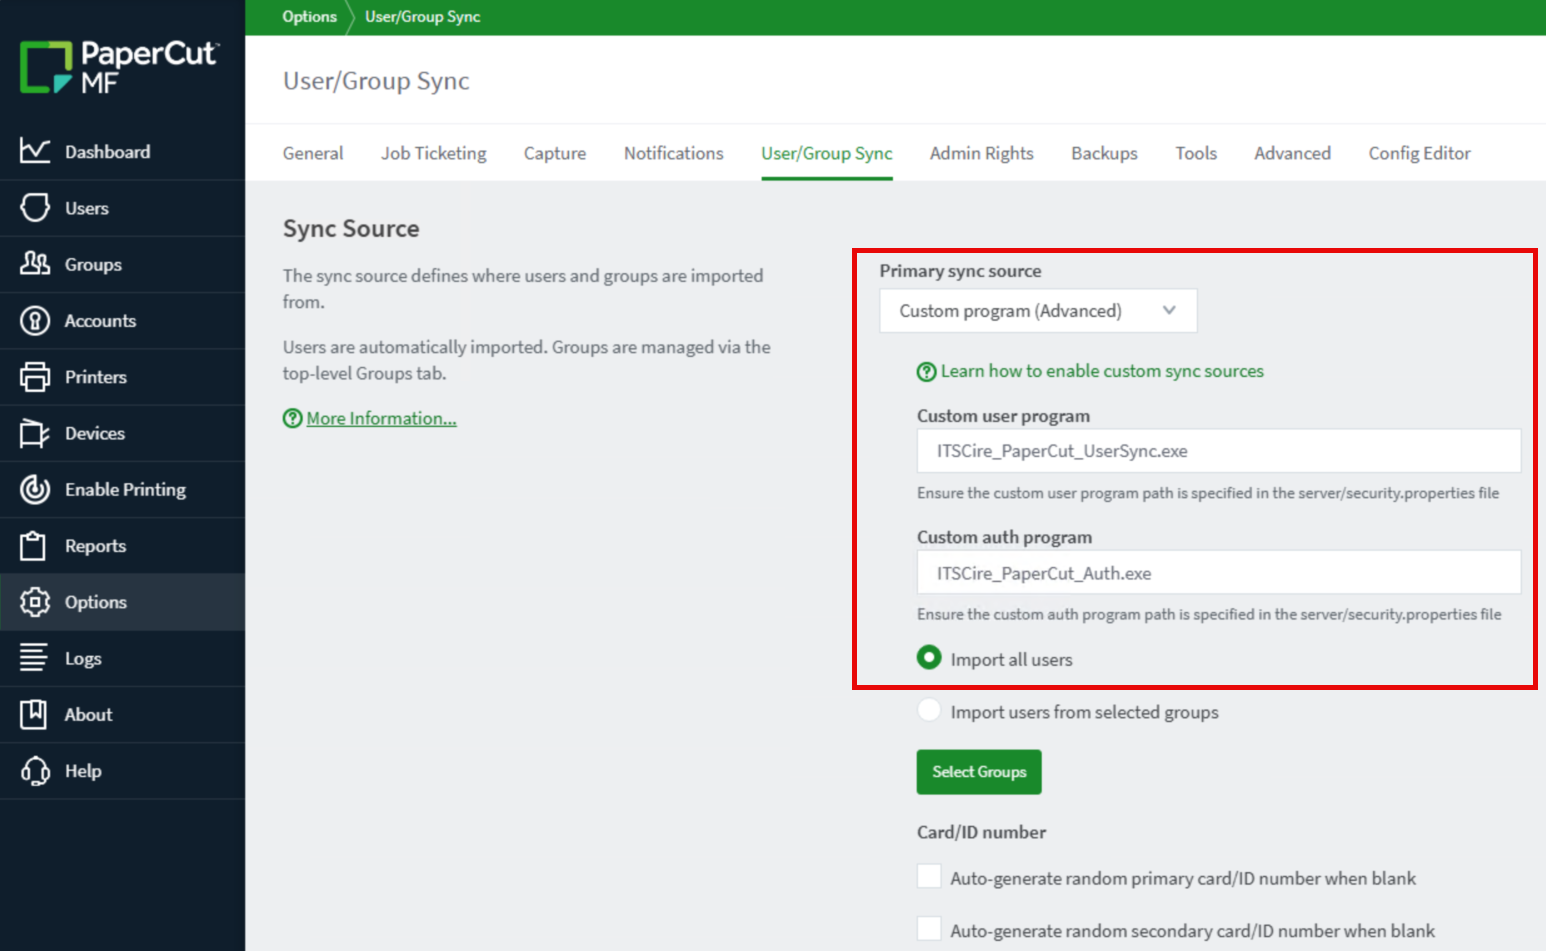
Navigate to Options > User/Group Sync.
Under Primary Sync Source, select Custom Program (Advanced).
-
In the Custom Program (Advanced) section, confirm or set the following:
Custom User Program: ITSCire_PaperCut_UserSync.exe
Custom Auth Program: ITSCire_PaperCut_Auth.exe
After configuring the above, scroll past the Sync Options section and click APPLY.
2. Configure PaperCut Security Settings
Open the security.properties file at InstallationDrive\Program Files\PaperCut MF\server, using Notepad or another text editor with administrator permissions.
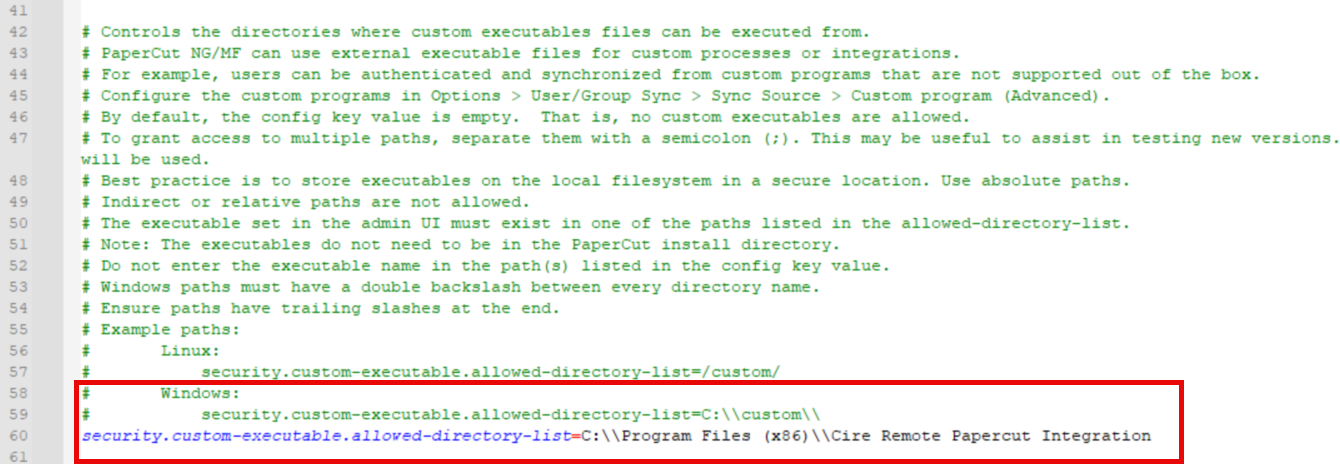
Find the line starting with security.custom-executable.allowed-directory-list=.
Set this value to the installation directory of the Cire-PaperCut Integration Tool. This allows PaperCut to run only the custom executable files from specific directories. Note the double \\ in the file path. This is expected within PaperCut.
Save the file.
Restart the PaperCut services if you made changes to the configuration or security settings. If you didn't make any changes, skip this step.
Configure the Cire-PaperCut Integration Tool
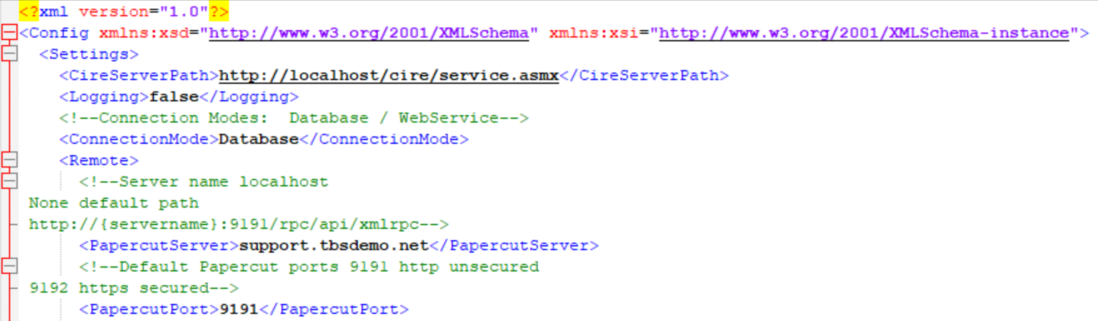
Navigate to C:\ProgramData\ITS\Cire\Server and open ExternalInterfaceConfig.xml in a text editor with administrator permissions.
-
Verify that CireServerPath is accessible. This may require updating if:
The customer is using SSL only.
IIS rules prevent 'localhost' URLs.
Cire is installed on a different server than PaperCut.
-
Set the ConnectionMode:
Database (recommended): Directly connects to the Cire database for user and group sync. This is the preferred mode, especially for larger sites, as it is much faster and avoids overloading the web API.
WebService: Uses the Cire web API. This can significantly slow down sync for large environments.
Check that PapercutServer and PapercutPort are set correctly and accessible. Update these settings as needed, especially if SSL is required or PaperCut is hosted on a different server.
Test the Integration
Ensure a user account exists in Cire but not in PaperCut. Delete the user from PaperCut if necessary for testing.
Log in to the PaperCut user portal at http://servername:9191/user to trigger account creation and verify that the sync works as expected.
If PaperCut creates the user as expected, the integration is complete and functioning properly. If any issues arise, review the steps above and ensure all paths, permissions, and configuration values are correct.