
How to setup a Nayax VPOS Touch using Ethernet on the network
Parts Needed: Nayax Ethernet Adapter Cable (RJ11 to RJ45)
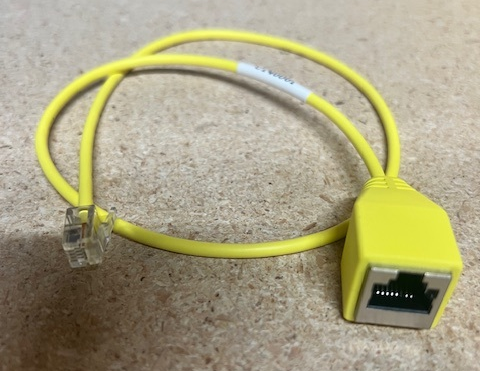
Part Number: C140001
IP Information Needed:
- Static IP Address for each device (recommended)
- Subnet
- Gateway
- DNS Server 1
- DNS Server 2 (If applicable)
NOTE: Devices can use DHCP, but it is not recommended unless the network is PCI compliant.
INTRO:
In some cases, the VPOS Touch cannot communicate effectively using a cellular signal. One option to bypass this is to connect the device via Ethernet. This tutorial will cover what is needed to set up an ethernet connection to the VPOS Touch device.
Note: To connect the device via Ethernet, the steps highlighted in this tutorial MUST be followed as written. Deviation from this tutorial during device setup could complicate any attempts to troubleshoot further issues. The Nayax device is designed to fall back on a cellular connection if the Ethernet connection fails.
Please also review this article for firewall rules and routing information for how the devices connect to Nayax: Endpoints and ports for a networked Nayax VPOS Touch Device | TBS Libraries KB
SETUP:
Note: to set up the readers, they must be able to get the new setting via the Cellular Network. Ensure that these settings are established before placing the reader in an area with no cell reception.
Enable Ethernet/WiFi on the Card Reader
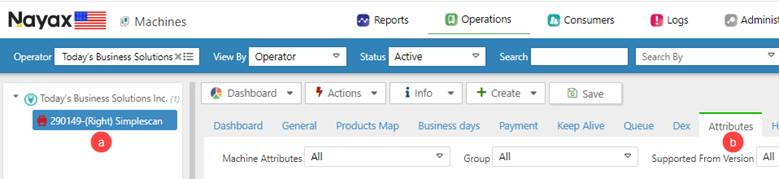
Operations
Machines
Operator (Enter Customer Name)
Search

All of the readers under that customer will be displayed
Click on the reader you wish to add Enternet / WiFi to
Click on Attributes
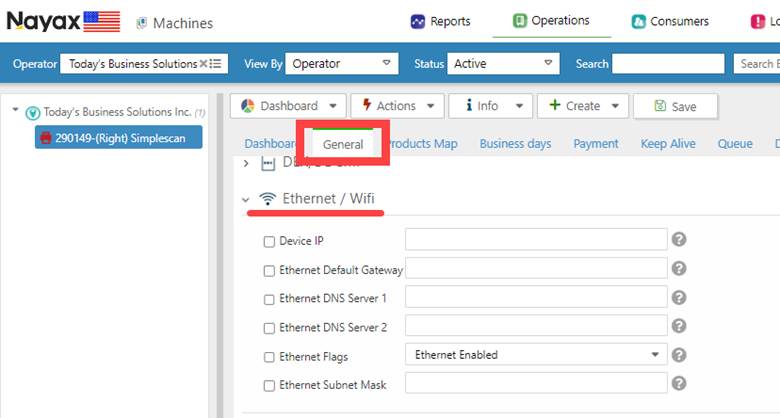
Under the Group Pulldown. scroll down to the Ethernet / WiFi, this will display all of the options for Ethernet
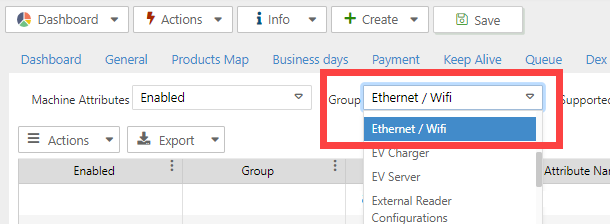
This will filter out all of the options and only the Ethernet settings will remain. Only enable the items listed below. (I am waiting for clearification from Nayax about the other options meaning)
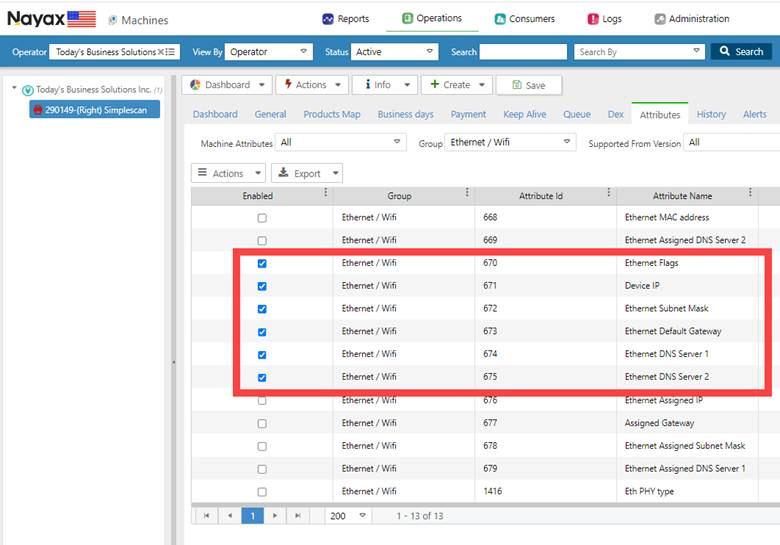
Click on the General Tab and a new Option will appear “Ethernet / WiFi”
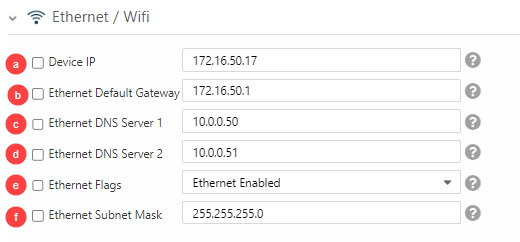
To set up Static IPenter all of the info requested
Device IP
Default Gateway
DNS Server 1
DNS Server 2
Flags should be set to “Ethernet Enabled”
Subnet Mask
NOTE: If using DHCP, only set ‘Ethernet Flags’ to Ethernet Enabled, and nothing else.
Be sure to click on SAVE

To set up DCHC, leave all of the fields blank and be sure to set the Flag field to “Ethernet Enabled”
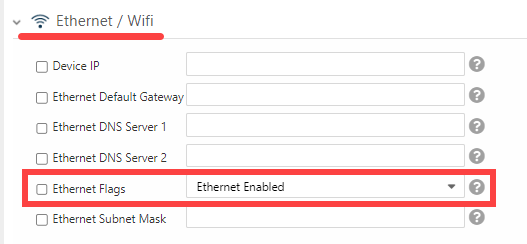
This is all that is required for DCHP
Be sure to click on SAVE

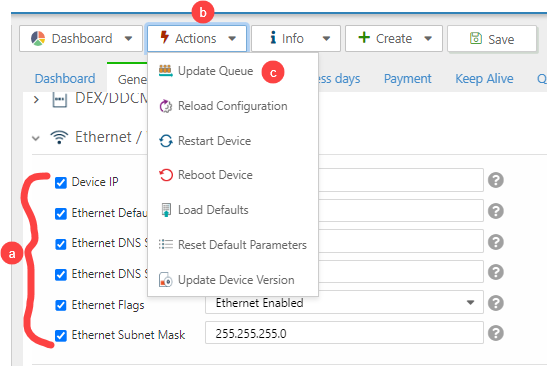
To push the changes to the Reader,
Choose all of the fields (Do this for Static or DHCP)
Click on Actions
Choose “Update Queue”
9. On the vPOS Touch itself, you will need to plug in the Nayax Cable (Part# C140001) into the device here:
TROUBLESHOOTING:
Be sure that the new settings are pushed to the reader via the Cellular Network.
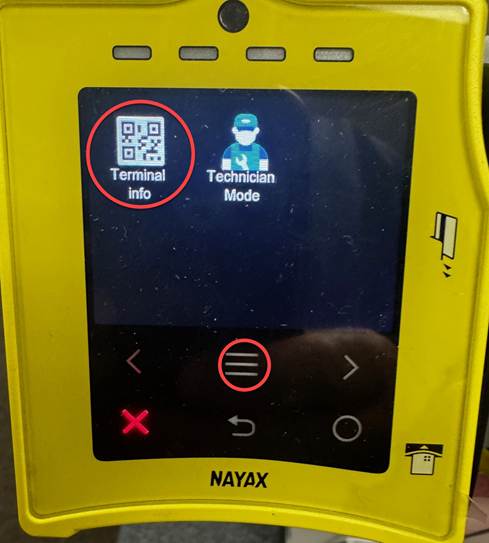
If the reader cannot connect via IP, the reader will try to connect to the Cellular Network. So, the Info screen will show the traditional screen with the RSSI Value.
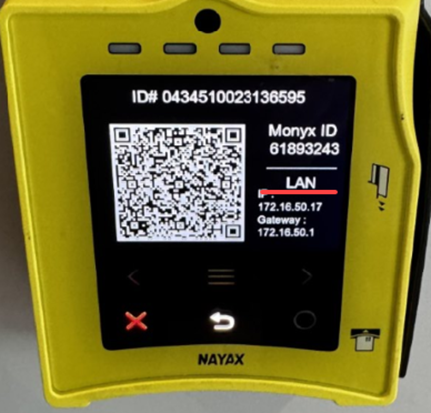
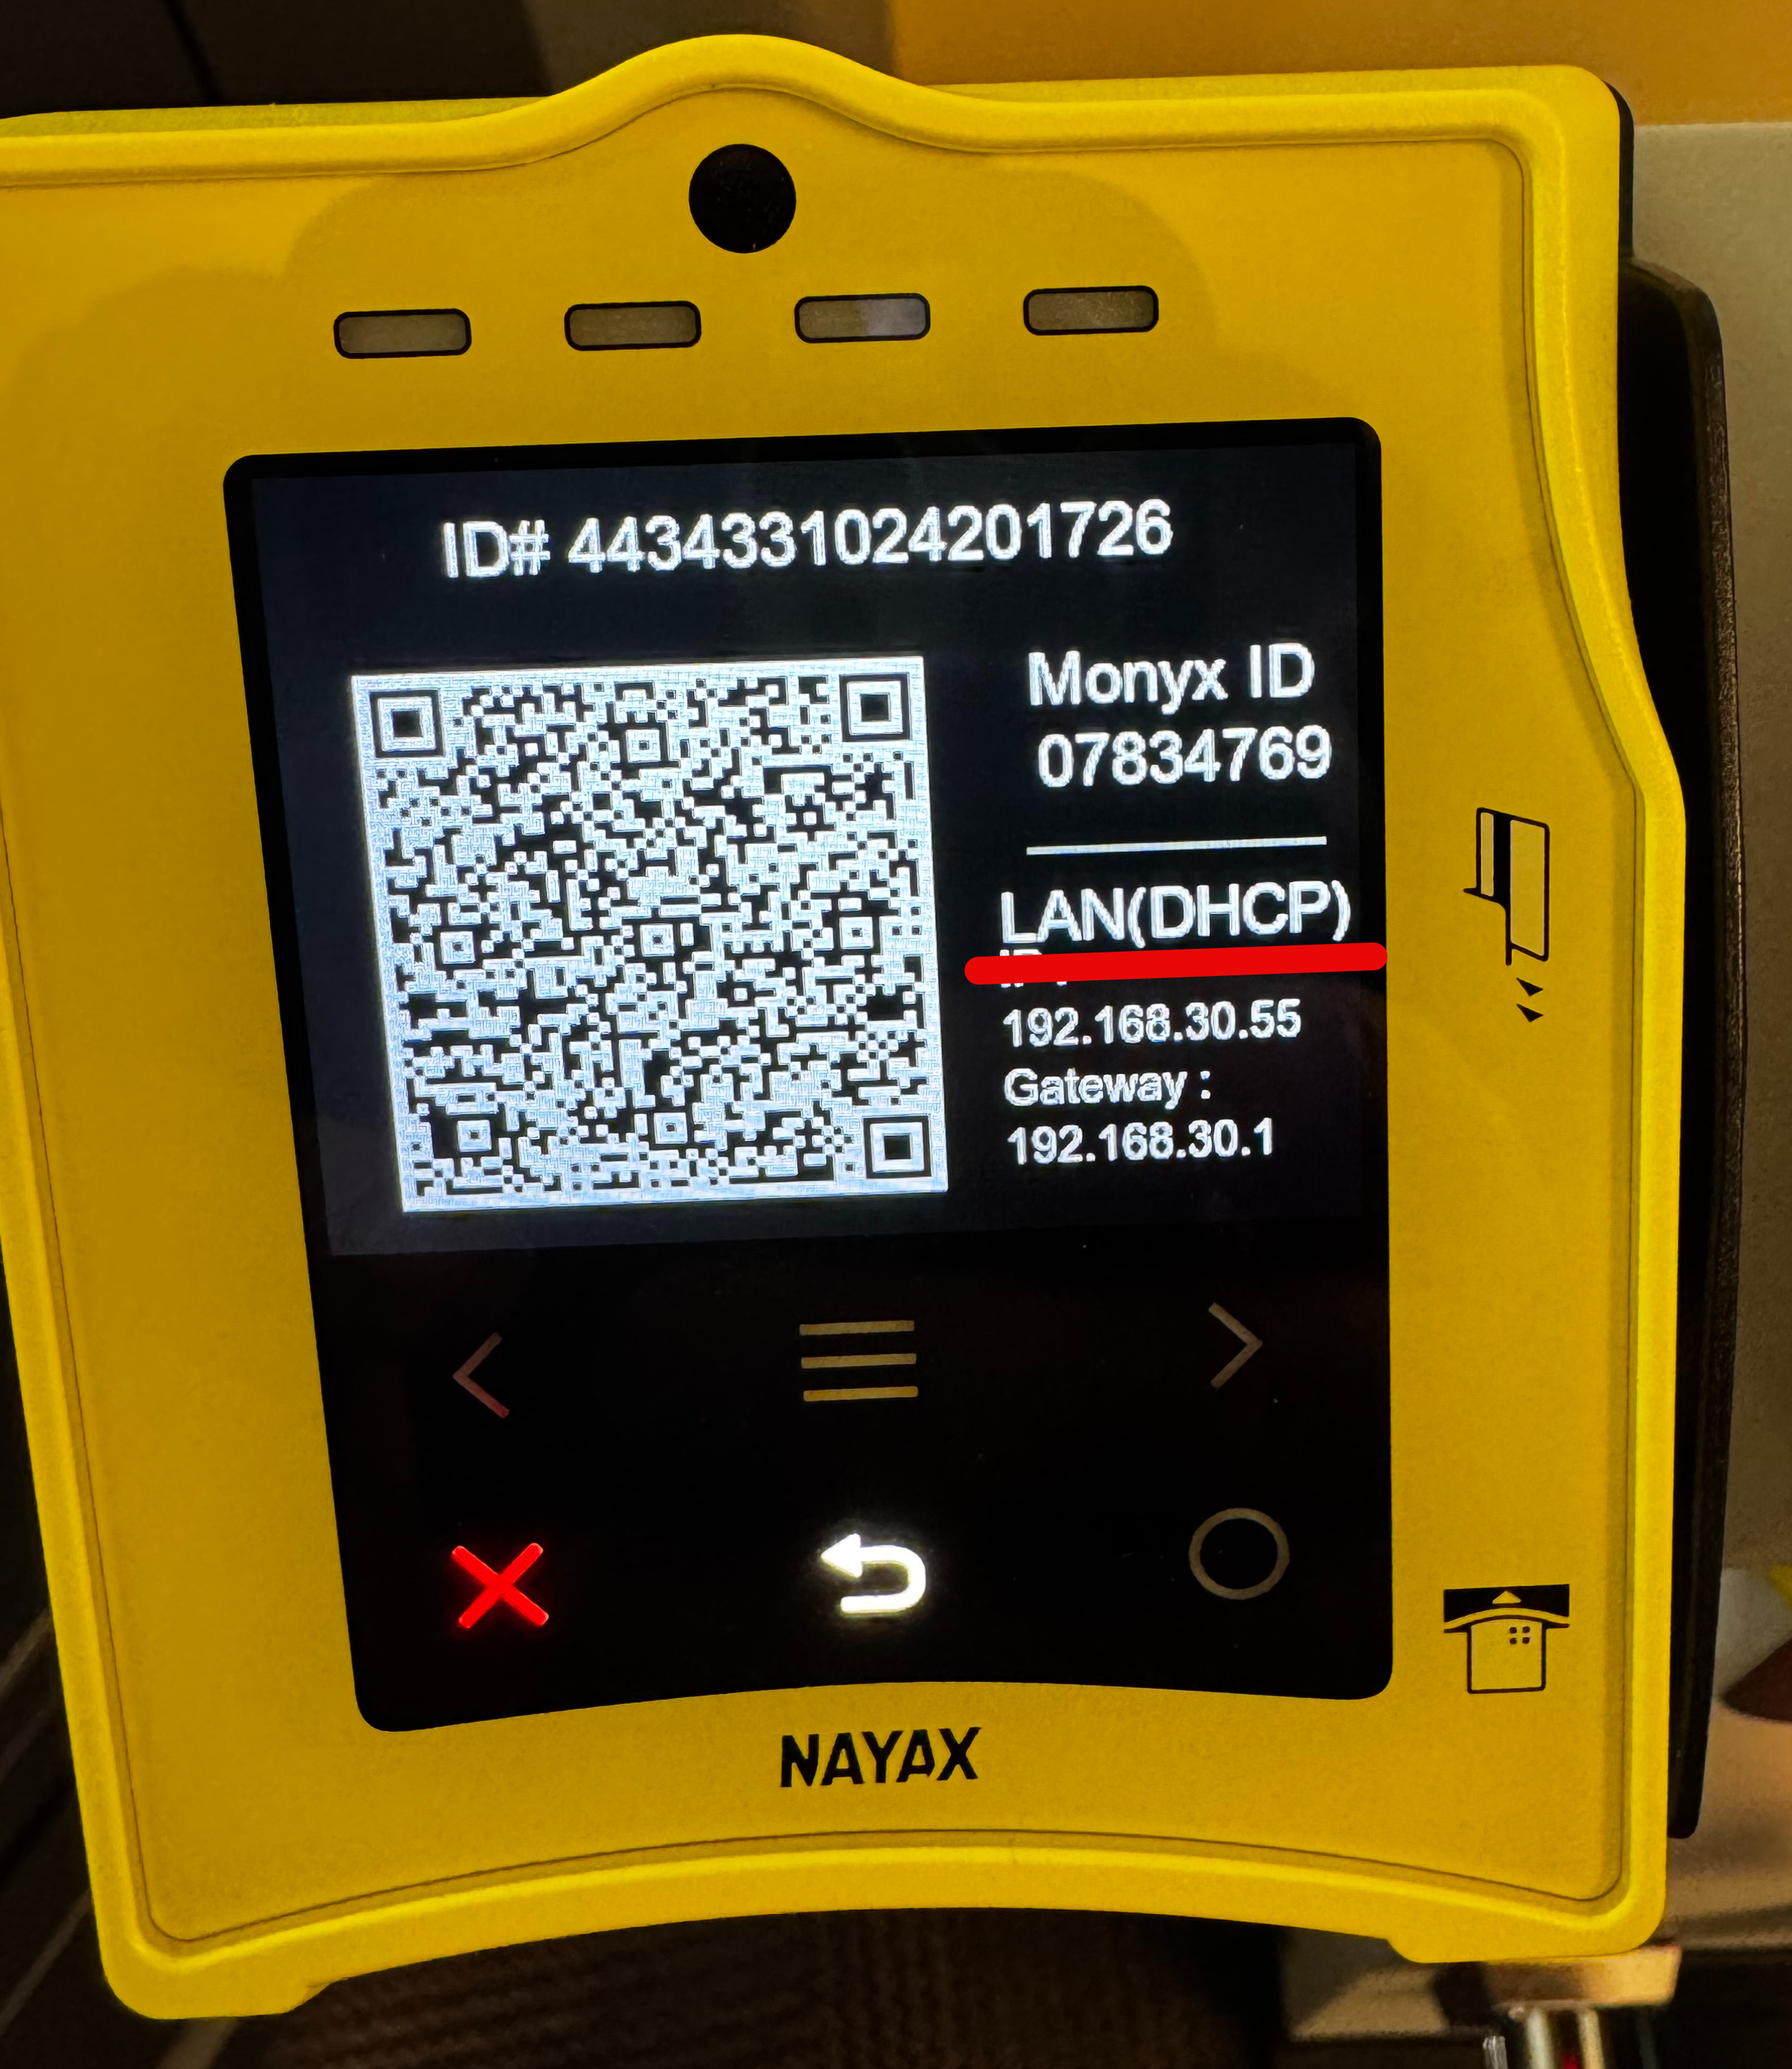
If the IP address appears on the Info page but still cannot be connected, test the network port with your laptop to verify that the Static or DHCP IP address provided can reach the Web.
If the MAC address is required for connecting devices through a clients Ethernet, please follow these rules to obtain the address (MAC address will always be of format 02.00.00.X.Y.Z where the last 3 bytes are derived from the SN)
1. Obtain serial number (Example: 0404043518526484)
2. Convert serial number to HEX (16F79B6654414) [NOTE: use a Decimal to Hexadecimal converter from the internet.]
3. Last byte (14 in the example) will be placed in place of X
4. Second to last byte (44) will be placed in place of Y
5. Third to last byte (65) will be placed in place of Z
6. End result should be 02.00.00.14.44.65