How to Install and configure TBS Client for Easybooking Kiosk Mode
This article provides a comprehensive step-by-step guide for installing tbsclient.exe on a reservation PC for patron-facing, easy booking. It covers prerequisites, configuration, and important considerations to ensure a successful installation and initial setup. Please read through all sections before starting the process to avoid potential issues.
Prerequisites
Before installing tbsclient.exe, ensure that your environment meets the following requirements:
Supported Operating System: Windows 10/11 64-bit with all the latest updates
.NET Framework: .NET Framework 4.8 is required.
Chrome Browser (For Kiosk Mode): Chrome is currently the only supported browser.
Port 8080 (Internal): Port 8080 must be available on the PC. The Easybooking function in the browser communicates with the TBS Client on port 8080, providing the Server the Computer Name so the system knows which settings to load based on the Station PC Name.
Easybooking Kiosk is Created: A kiosk must be created and configured to ensure all components are working as expected. If not, the Default Kiosk will be loaded and will not function the same, as the Default Kiosk is intended for remote bookings and cannot print receipts.
Running the tbsclient.exe Installation
Launch the tbsclient.exe installer. This can be downloaded from the inetpub/tbsportal directory on the server, or when you browse to your /tbsportal webpage and get prompted to download.
-
Follow the installation prompts:
-
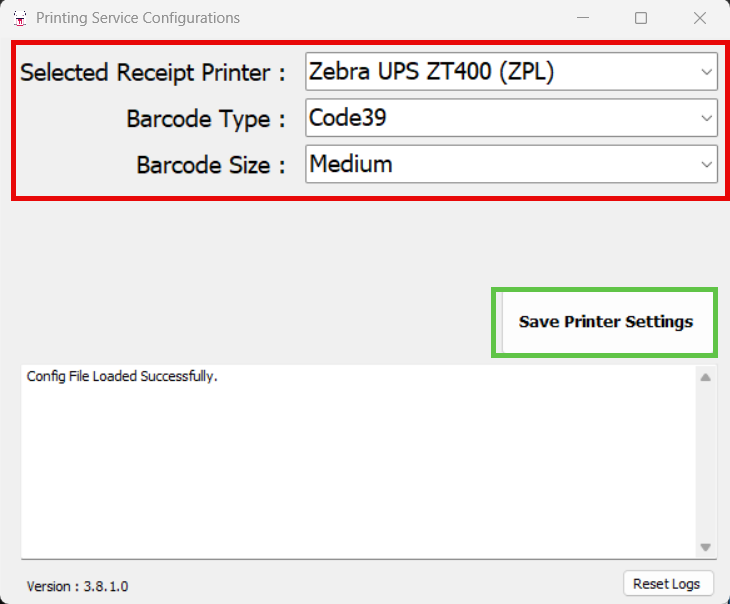
When prompted for the Printing Service Configurations Window, configure the following:
Selected Receipt Printer (must be a local printer, not shared): This is used for Guest Pass printing on a Staff PC, or to print an EasyBooking receipt from a patron-facing EasyBooking Station.
Barcode Type: By default, should be Code39, unless communicated differently by TBS Technician, or Library IT.
Barcode Size: By Default, should be MEDIUM. This has been the perfect size, but you'd like it smaller or larger, there are other options.
Click Save Printer Settings
-
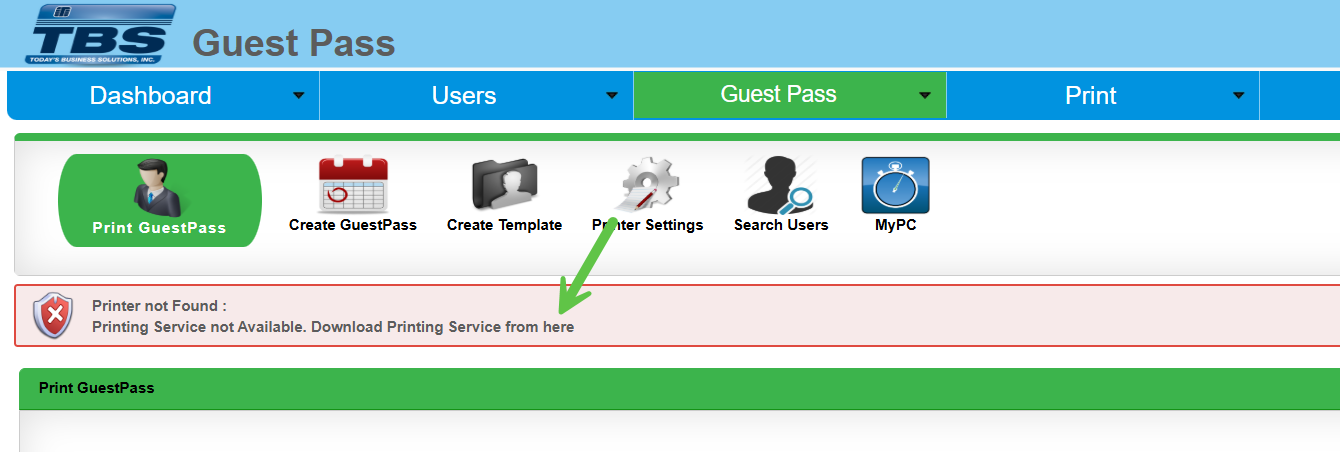
Post-Installation Configuration
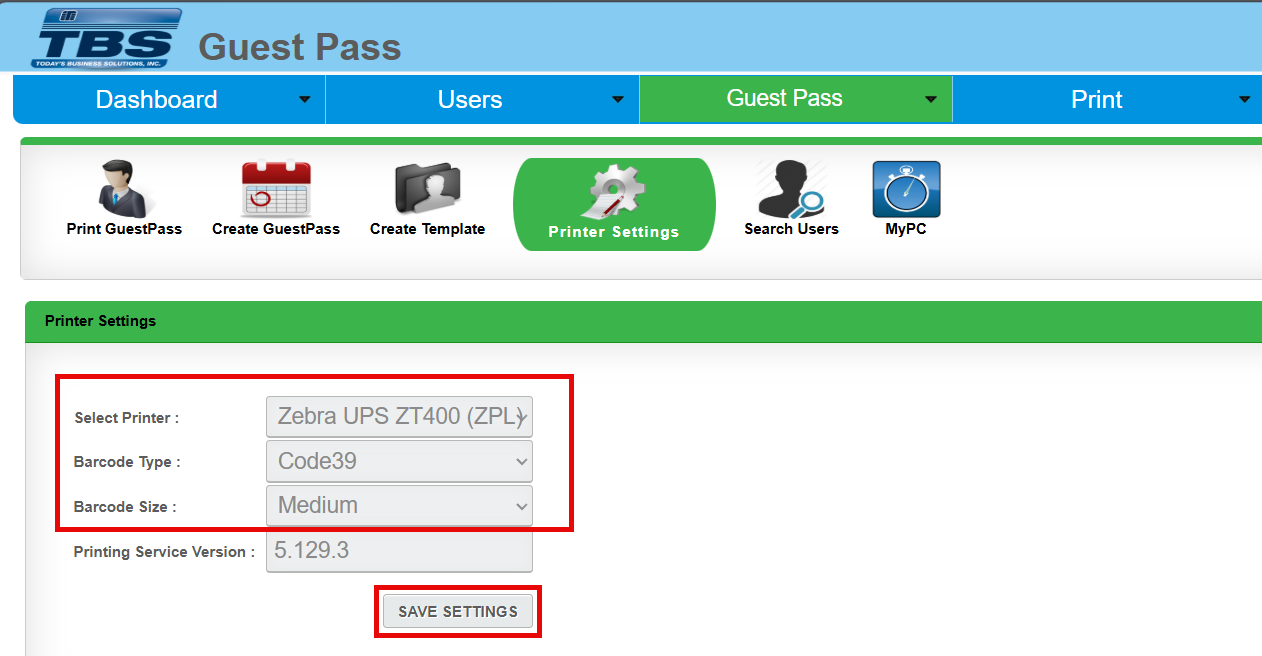
After the installation, confirm that the TBS Portal Printer Settings are loading, which provides confirmation the service is running and communicating on Port 8080 properly.
Configuring Kiosk Mode
After installing tbsclient.exe, browse to the installation directory to configure the "kioskmode.exe.config" file.
Installation Directory: C:\Program Files (x86)\TBS\TBS Printing Service\KioskMode.exe.config
-
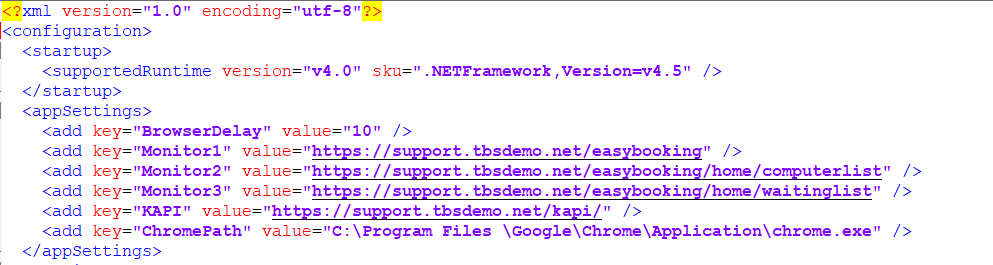
Edit the .config file. The following lines should be edited to match the servername, EasyBooking URLs, and the Delay Timer.
Browser Delay: This delays the browser from launching in kiosk mode for XX seconds for the system to boot and connect to the network to avoid any communication issues with EasyBooking. TBS recommends 10 seconds.
Monitor1: This is the URL that launches in kiosk Mode on your main display/monitor.
Monitor2: This is the URL that launches in kiosk Mode on your second display/monitor and can be used to display the Computer List or Waiting List on its own. (Usually a larger Monitor/TV)
Monitor3: This is the URL that launches in kiosk Mode on your second display/monitor and can be used to display the Computer List or Waiting List on its own. (Usually a larger Monitor/TV)
KAPI: This is the KAPI that EasyBooking is connecting to. This is an API on your TBS Portal Server.
ChromePath: This is the path where Chrome is installed on this PC.
Adding KioskMode.exe to Windows Startup. This can be done in many ways, such as creating a shortcut, adding it to the All Users startup folder in Windows, adding it to the specific user's startup so it launches only with the user you want to use for the station, or through the 'Run' registry.
Things to Note
Confirm that you have added a new Kiosk in the TBS Portal for this device and that the PC Name is accurate.
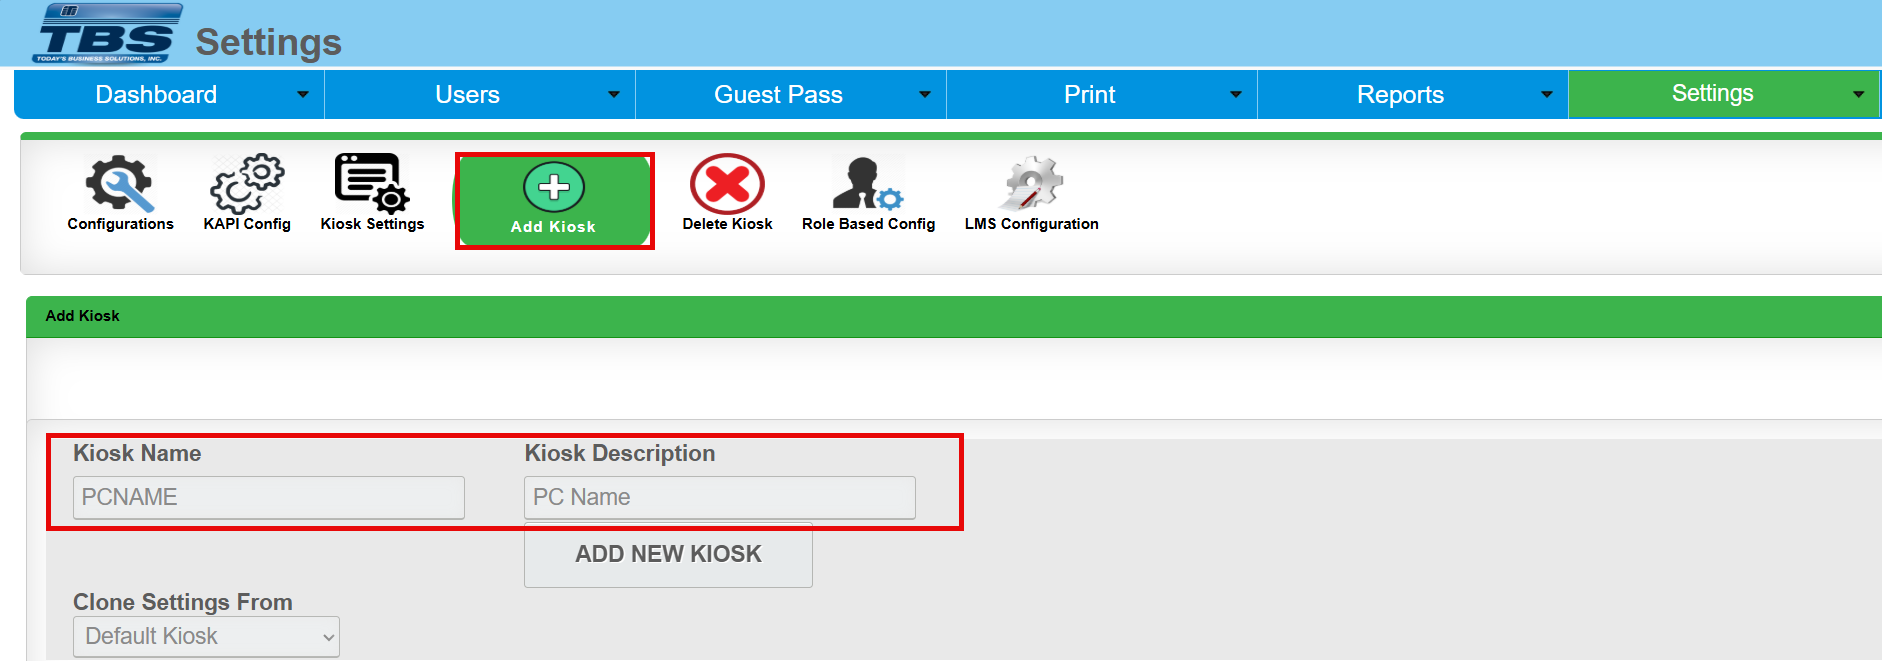
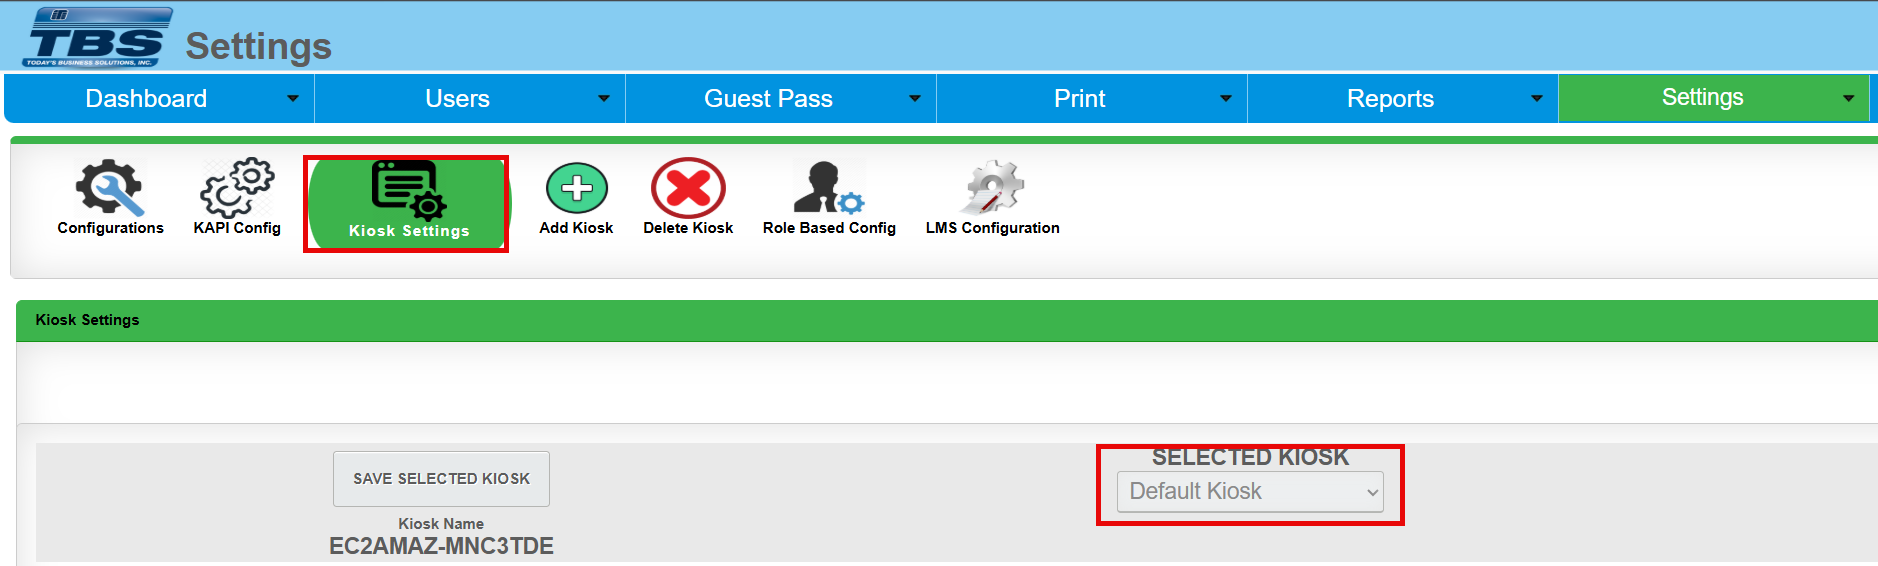
If the Site is not configured for a specific PC Name in the TBS Portal, the PC will load the DEFAULT KIOSK settings from the TBS Portal.
Troubleshooting
If you have the Specific Kiosk configured in the TBS Portal and confirmed the PC Name is correct under the kiosk, then confirm the following is correct.
Printer Settings
Please confirm the Printer Setting is correct.
TBS Printing Service
-
Check and Confirm:
‘TBS Printing Service’ is installed and version matches the server and/or other staff PCs.
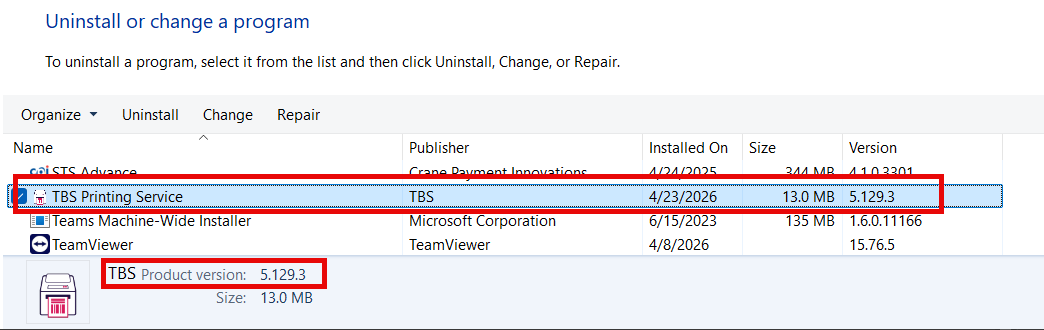
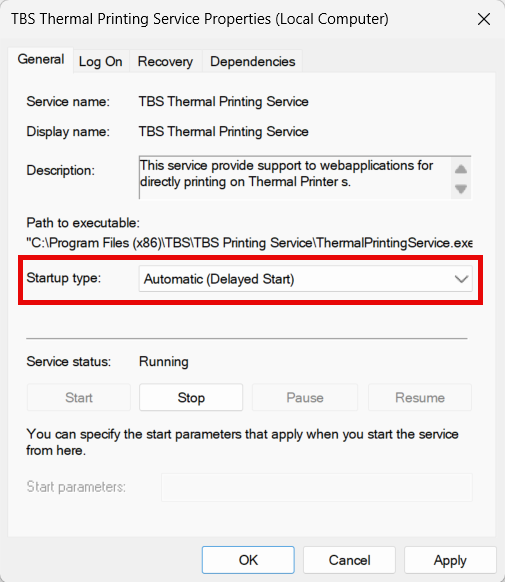
‘TBS Thermal Print Service’ Service is running.

IF ‘TBS Printing Service’ doesn’t isn’t running at startup, please change the Service to Automatic (Delayed Start).