
How To Configure TBS 9900/Kiosk - Basic configurations
Welcome! This guide will walk you through operating and configuring your TBS kiosk, including hardware and software settings, troubleshooting, and best practices. Whether you’re setting up for the first time or making adjustments, you’ll find clear, step-by-step instructions, helpful tips, and detailed definitions to make your experience smooth and successful.
Prerequisites: What You’ll Need
Citizen Printer (with cable or dongle) for printing audit reports. (if applicable)
Physical access to the kiosk’s coin box and bill recycler for hardware adjustments.
Signal Booster (optional, for Nayax units with low signal strength).
Key Concepts and Definitions
Audit: Menu for printing audit reports, checking or modifying inventory, and resetting counters.
System Parameters: System-wide settings such as counters, station ID, printer type, and other operational controls.
Value Parameters: Settings related to currency, cash/card limits, and denomination acceptances.
Bill Recycler: Optional hardware for storing and recycling bills.
Nayax: The credit card reader that allows for Tap, Chip, and Swipe acceptance.
RSSI: Received Signal Strength Indicator; measures the wireless signal strength of Nayax card readers.
Signal Booster: Optional Nayax accessory to improve signal strength if RSSI is low.
Navigation Basics: Getting Around the Menus
Your kiosk uses a standard set of buttons for navigating menus and setting values:
Black Button: Opens the main menu, moves between menus, and exits to previous menus. Also used to scroll options.
Green Button: Selects/enters menu items, saves changes, and confirms actions.
Red/Blue Buttons: Modify values (increase or decrease numbers, scroll through options or characters).
A common workflow is to use Black to navigate, Green to select or save, and Red/Blue to adjust values. Always use Green to save before exiting and use Black to ensure your changes are applied.
Step-by-Step Procedures
Accessing Menus
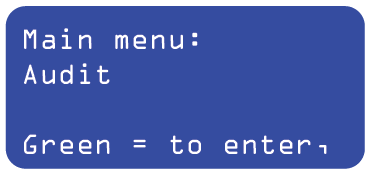
Press the Black button to enter the Main Menu.
Press Black again to toggle through available sub-menus, such as Audit, System Parameters, and Value Parameters.
Use the Green button to enter a menu or select a setting.
Within menus, use Red/Blue to modify values.
Press Green again to save changes.
To exit a menu or return to the previous screen, use the Black button.
Printing an Audit Report
Plug in your Citizen printer using the appropriate cable or dongle.
Navigate to the Audit menu using the Black button.
Press Green twice to begin printing the audit report.
Wait for the printer to finish. If nothing prints, check printer connections and paper.
For more details, download our Audit Guide: Click Here
Adjusting Inventory Counts
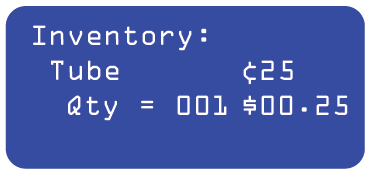
Enter the Inventory menu from the main interface.
Use Red/Blue to adjust the count for each item.
Press Green to save each item’s new value.
Repeat for all items as needed.
Exit the menu with the Black button.
Tip: Always save each item before moving on to the next to avoid losing changes.
Resetting Counters
Navigate to System Parameters using the Black button.
Select Counters Reset Mode.
Use the Red button to toggle the reset mode (ON/OFF).
Press Green to save your selection.
Important: Counters Reset Mode is disabled by default. If you enable it, counters will reset each time a receipt prints. Use this feature with caution to avoid data loss.
Setting the Station ID
Go to System Parameters > Station ID.
Use Red/Blue to change each character of the ID.
Press Green to save and move to the next character.
Continue until all characters are set as desired.
Press Black to exit when finished.
Selecting Printer Type
In the System Parameters menu, select Printer Type.
Use Red/Blue to scroll through available printer options (e.g., Citizen, Epson).
Press Green to save the chosen type.
Note: Ensure your physical printer matches the selected type for proper operation.
Currency and Value Settings
Navigate to Value Parameters (often under Copy Sales or PC Sales).
Select Currency Options for cash acceptance (Coins, $1, $5, $10, $20, and $2 if a Bill Recycler is present).
Use Red to modify which denominations are accepted.
Press Green to save your selections.
Press Black to exit.
Edge Case: If your local currency includes denominations not listed, ensure hardware compatibility before enabling.
Setting Maximum Cash and Card Values & Pre-Authorization Amounts
Within Value Parameters, choose Maximum Cash Value or Maximum Card Value.
Use Red/Blue to adjust the limit.
For Pre-Authorization, set the amount required before a card transaction can proceed.
Press Green to save each setting.
TBS Recommendation: Set Maximum Card Value and Credit Card Pre-Authorization to $0.00, as Nayax typically manages these values.
Maximum Cash Value: $20.00 is usually recommended. If set too low, larger cash inputs will be rejected.
Bill Recycler Settings
Accessing Bill Recycler Dipswitches
Physically remove the bill recycler from the coin box to access its dipswitch panel.
Ensure dipswitch #3 is set to OFF. Other switches should remain as recommended by the hardware manual.
Setting Bill Storage Capacity
Hold the Select button until the display shows ‘--’.