How to Create a user in ePRINTit SaaS cloud portal
Let's dive into the step-by-step process for adding a user to ePRINTit. Remember, if you need any assistance during these steps, please feel free to reach out to us for support.
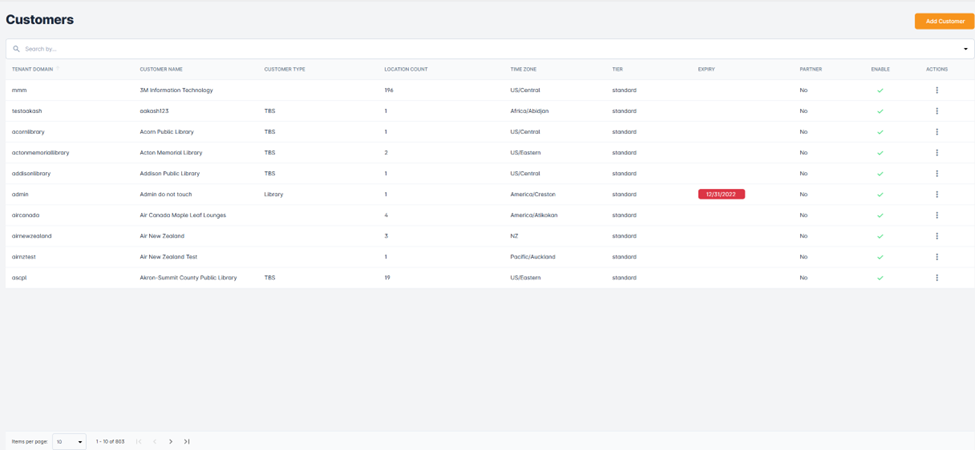
Search for the customer you want to add a user to
Start by locating the specific customer account where the new user will be added. This ensures that all user activities are correctly aligned with the appropriate account.
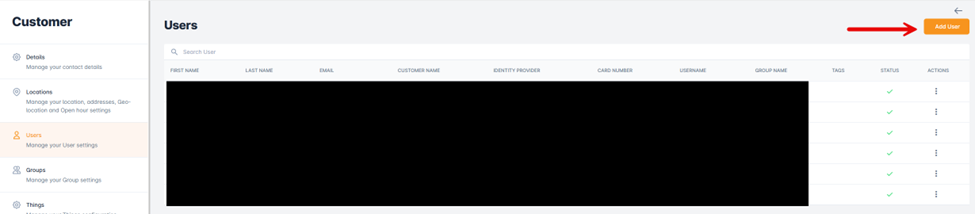
Navigate to the users tab and select Add User
Once you’ve identified the correct customer, head to the users tab. Here, you will find the option to Add User. Click on it to proceed to the user creation form.
Fill in the required details and click Add user
To complete the process, you'll need to provide certain information about the new user. This includes:
First name
Last name
Username
Group name
Primary email address
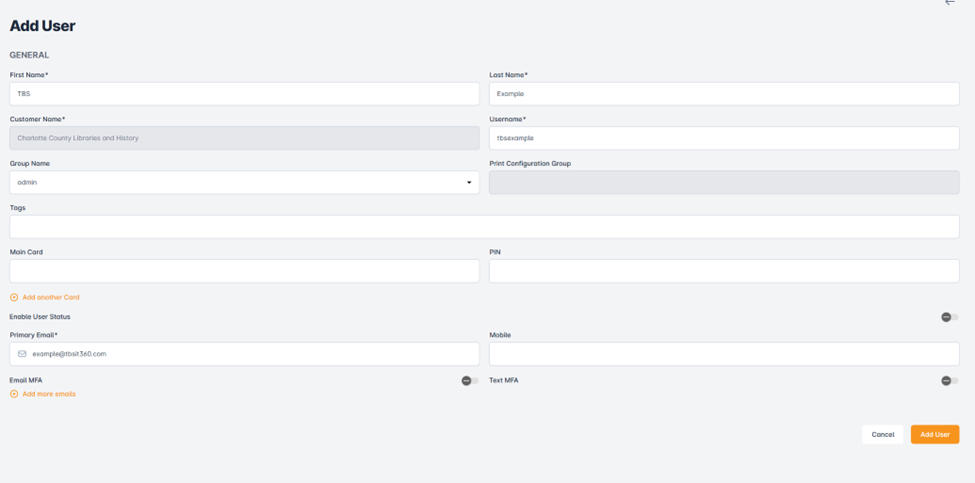
Make sure all fields are filled accurately to ensure seamless user access and communication. Once all the details have been entered, simply click on Add User.
If you encounter any issues or have questions about adding a user, we're here to help. Reach out to our support team for personalized assistance and ensure that every user's setup is successful and smooth.