
How to Setup Authorize.NET for easybooking fees/fines Module
Setting up Authorize.NET as your payment gateway for Fees/Fines payments through the Easybooking/TBS Portal is straightforward once you know the steps. This guide will walk you through the process, highlight important details, and help you avoid common pitfalls. You’ll be ready to accept payments in no time!
Before You Begin
Before you start setting up Authorize.NET, there’s one essential requirement: you must have an external URL for your Easybooking/TBS system. If you don’t have this yet, please set it up first. The external URL will be needed for configuring payment responses later in the process.
Step 1: Log In to Your Authorize.NET Account
Start by logging into your Authorize.NET account. All configuration steps will take place within the Authorize.NET merchant interface.
Step 2: Create Your API Transaction Key
The API Transaction Key is required for Easybooking Fees/Fines Payment module to communicate securely with Authorize.NET. Here’s how to obtain it:
-
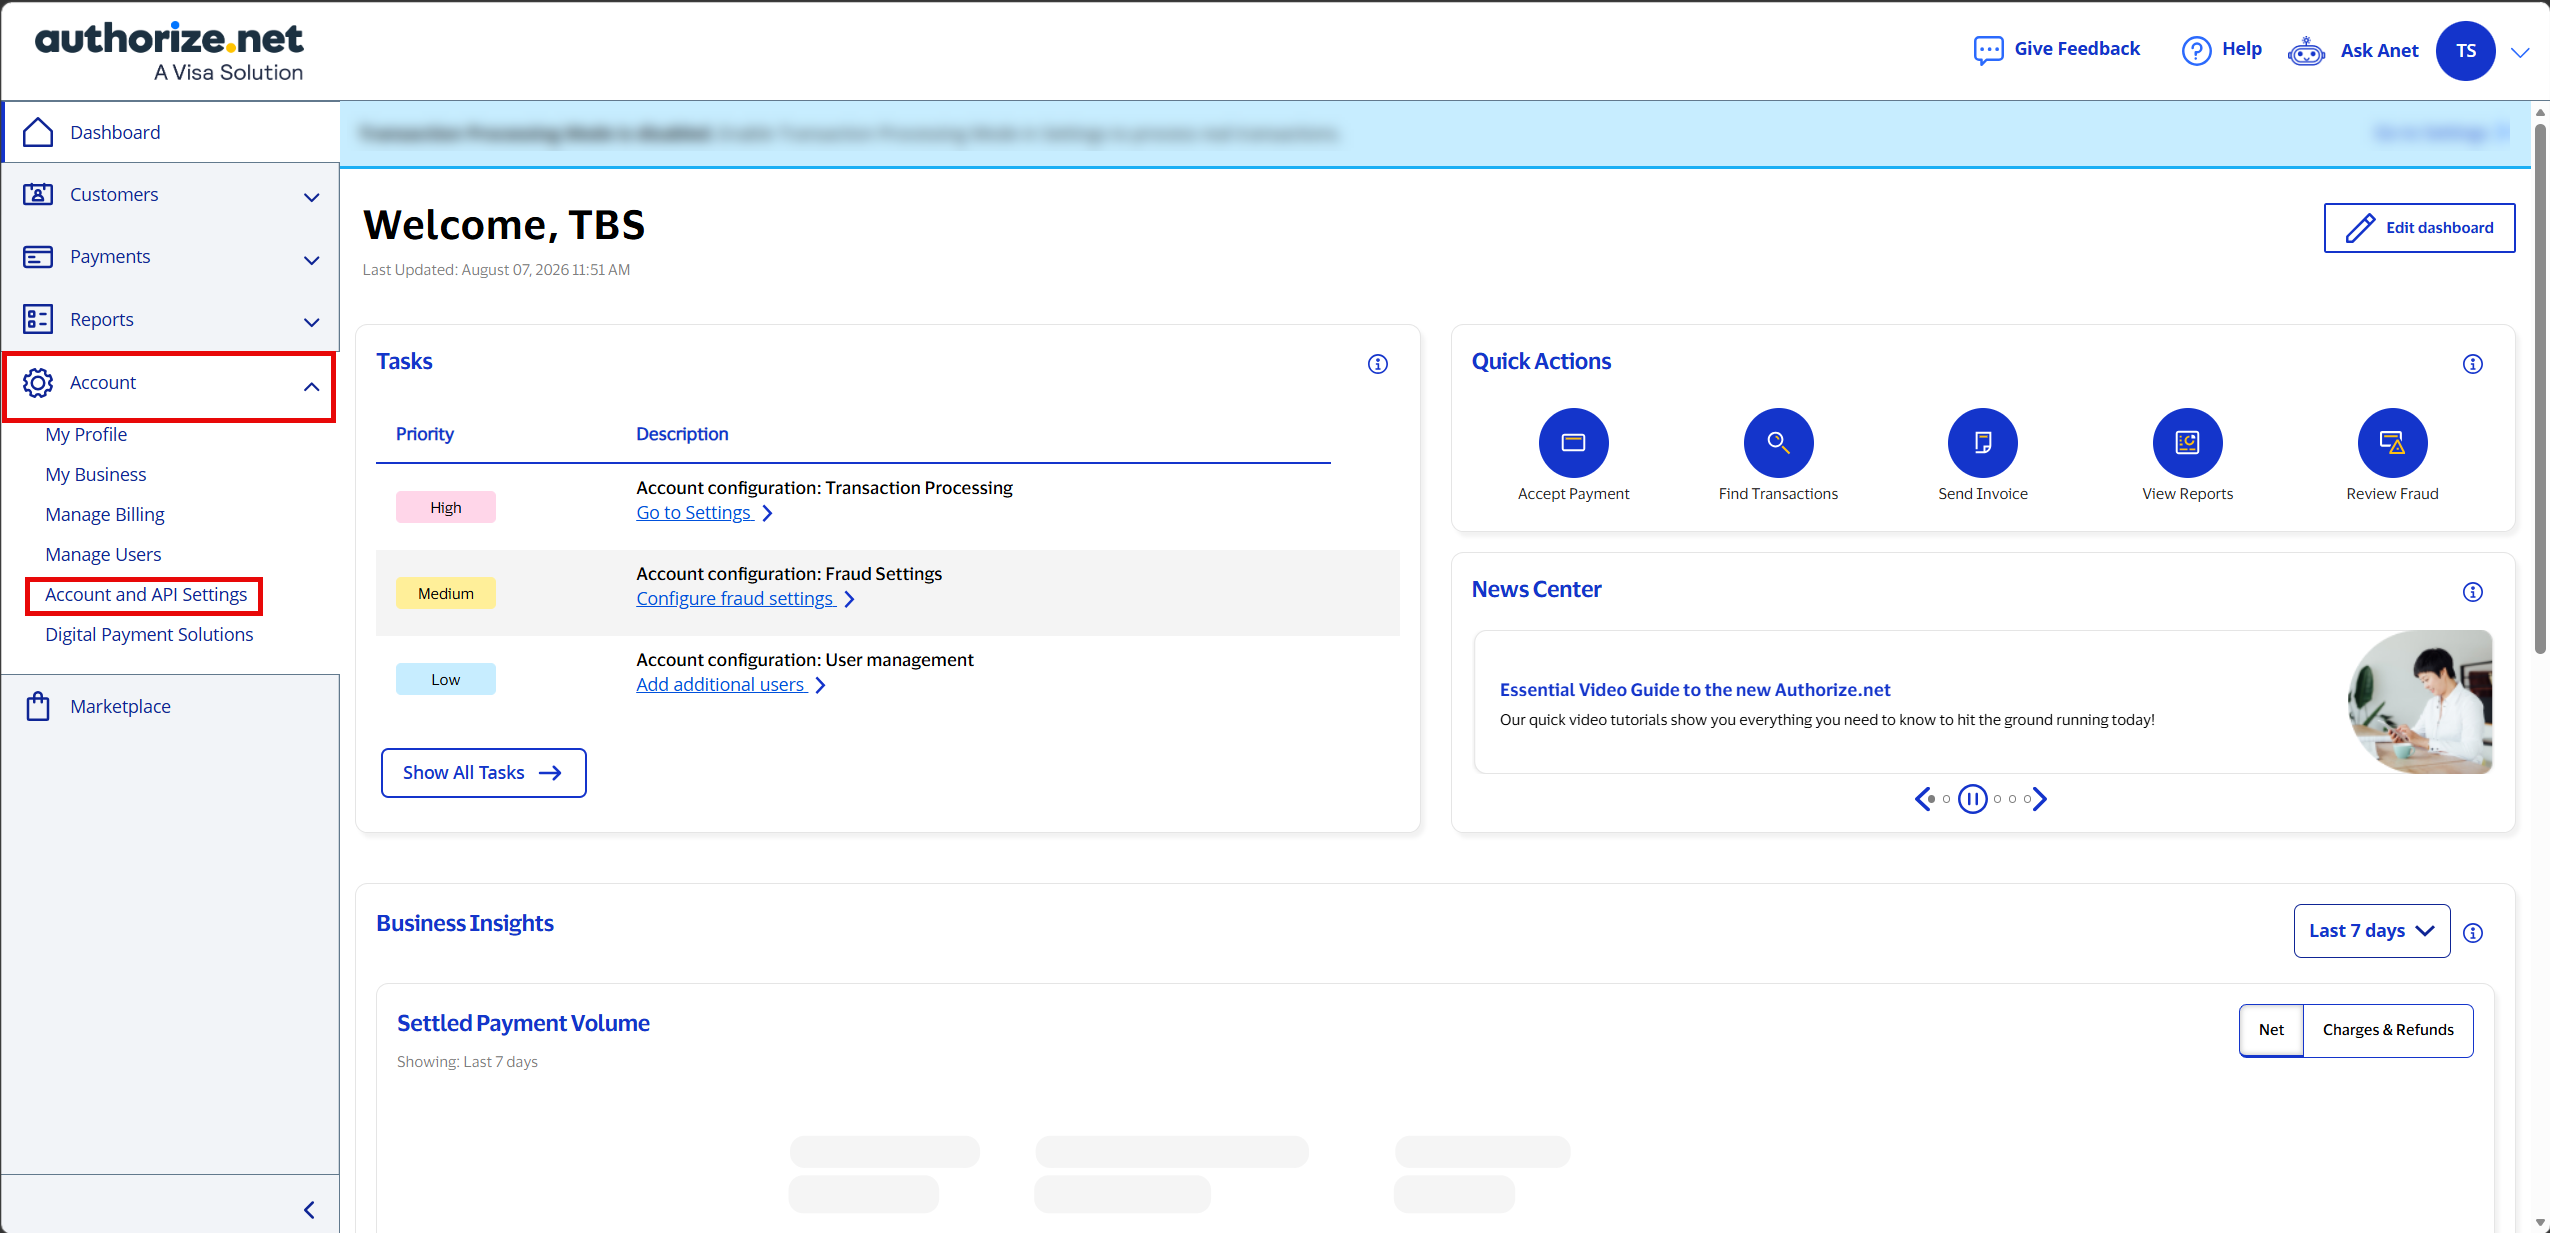
Navigate to the Account Tab:
After logging in, click on the ACCOUNT tab in the left dropdown menu and Select Account and API Settings.
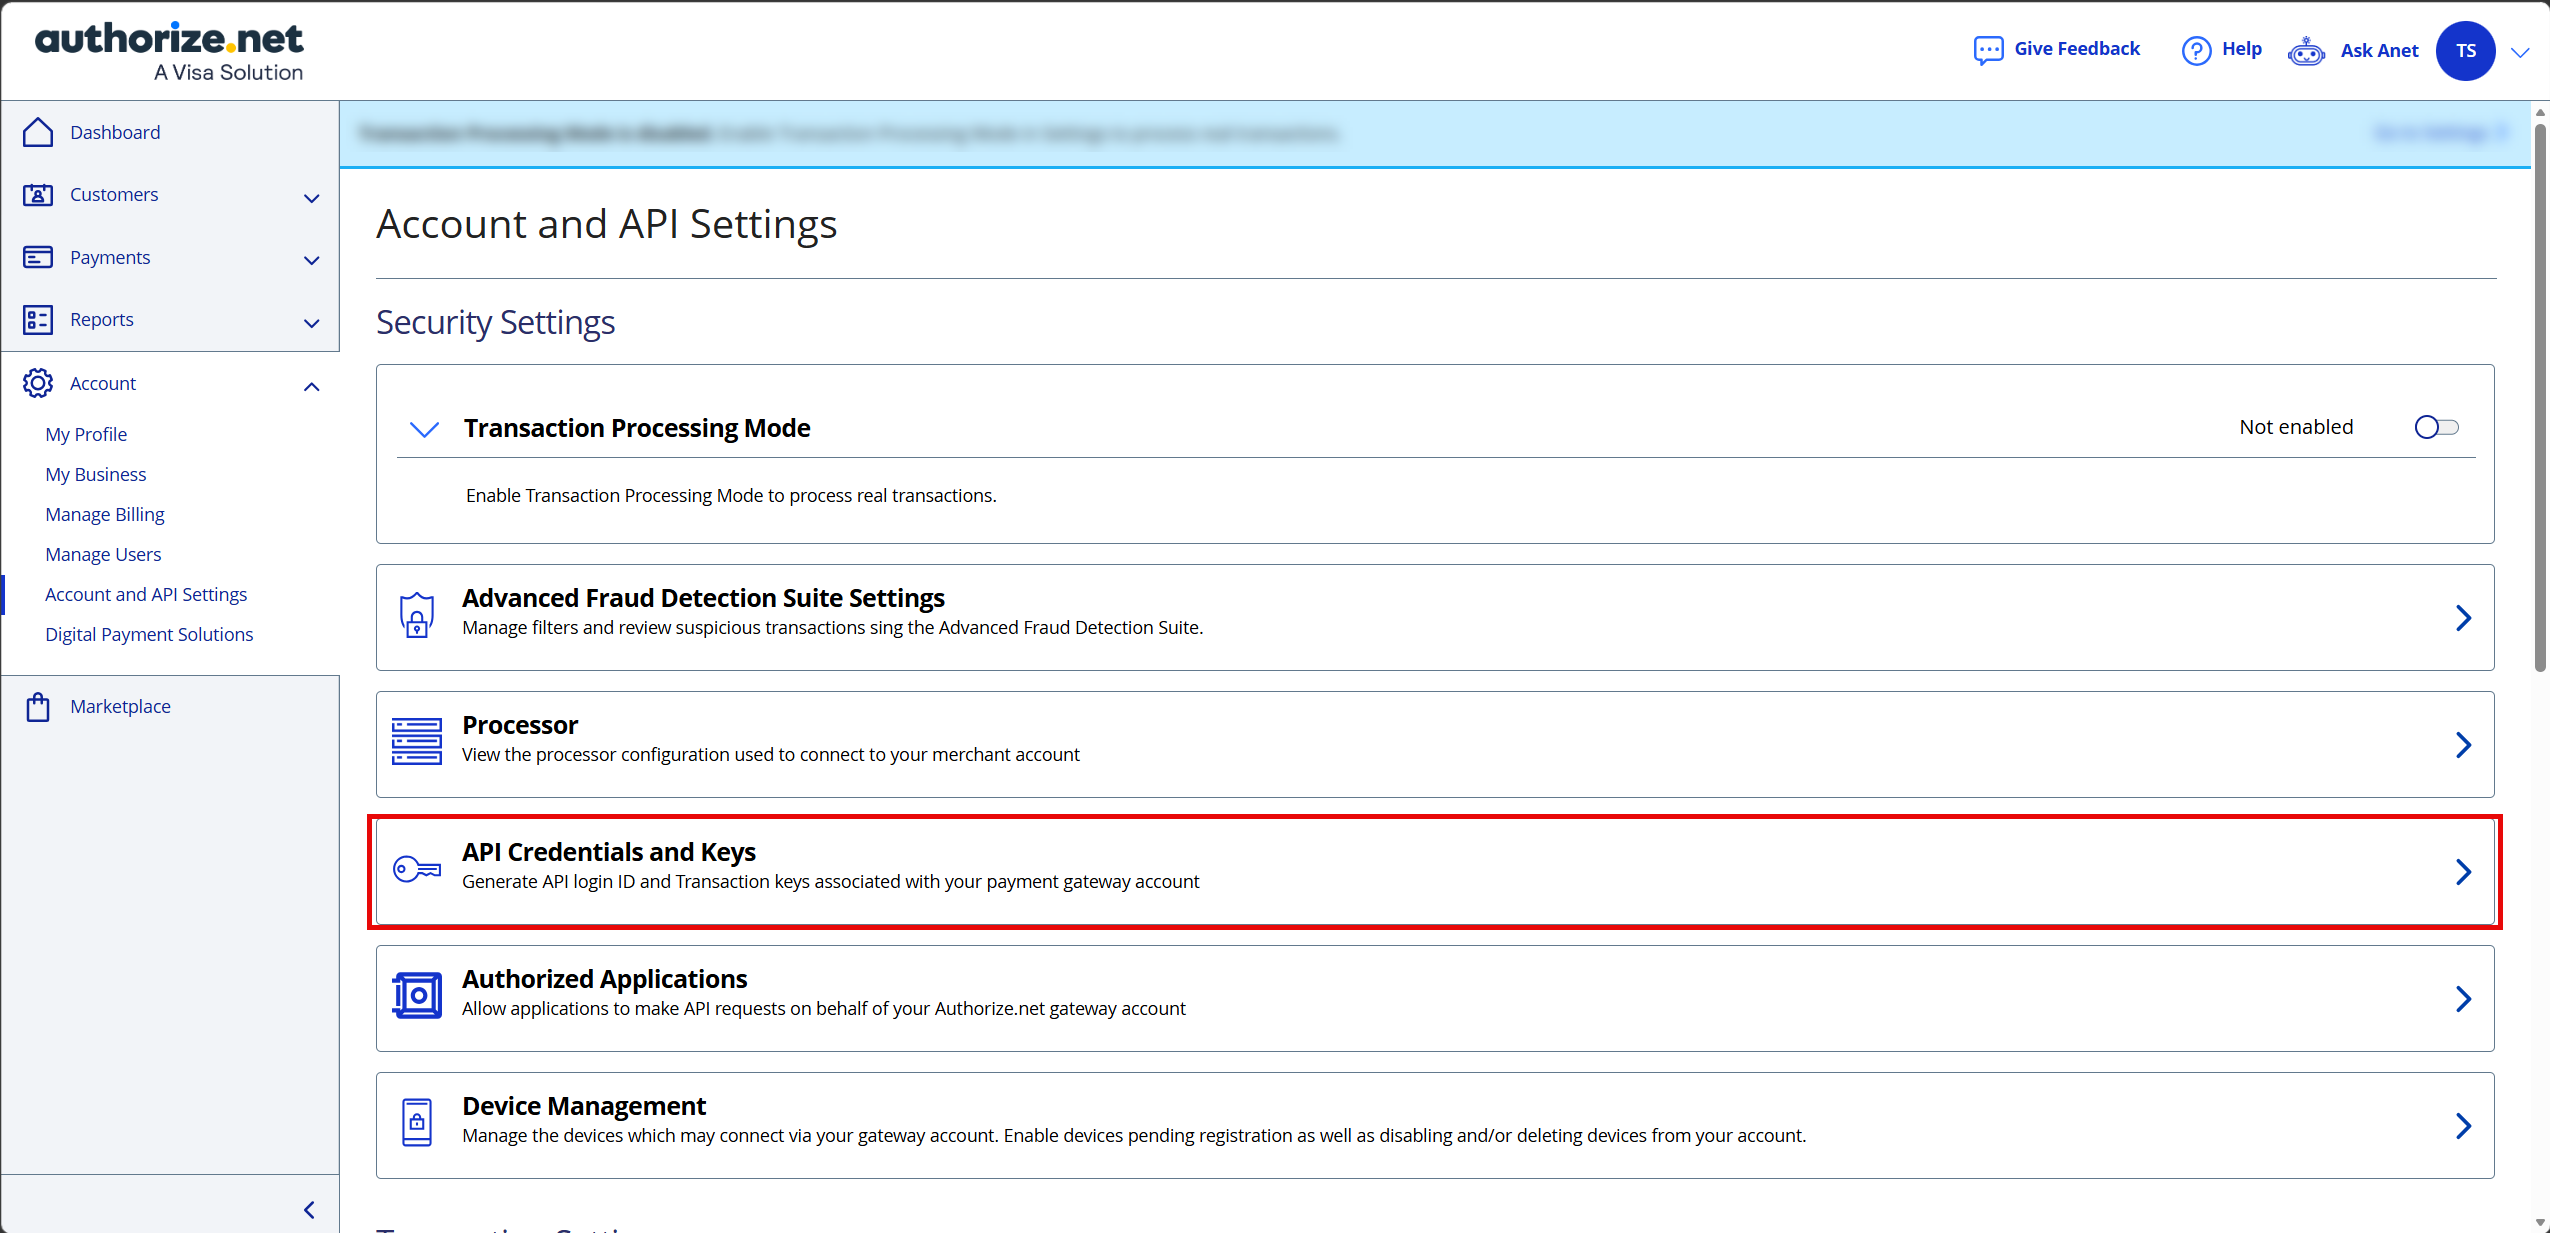
Under Security Settings, select API Credentials & Keys.
-
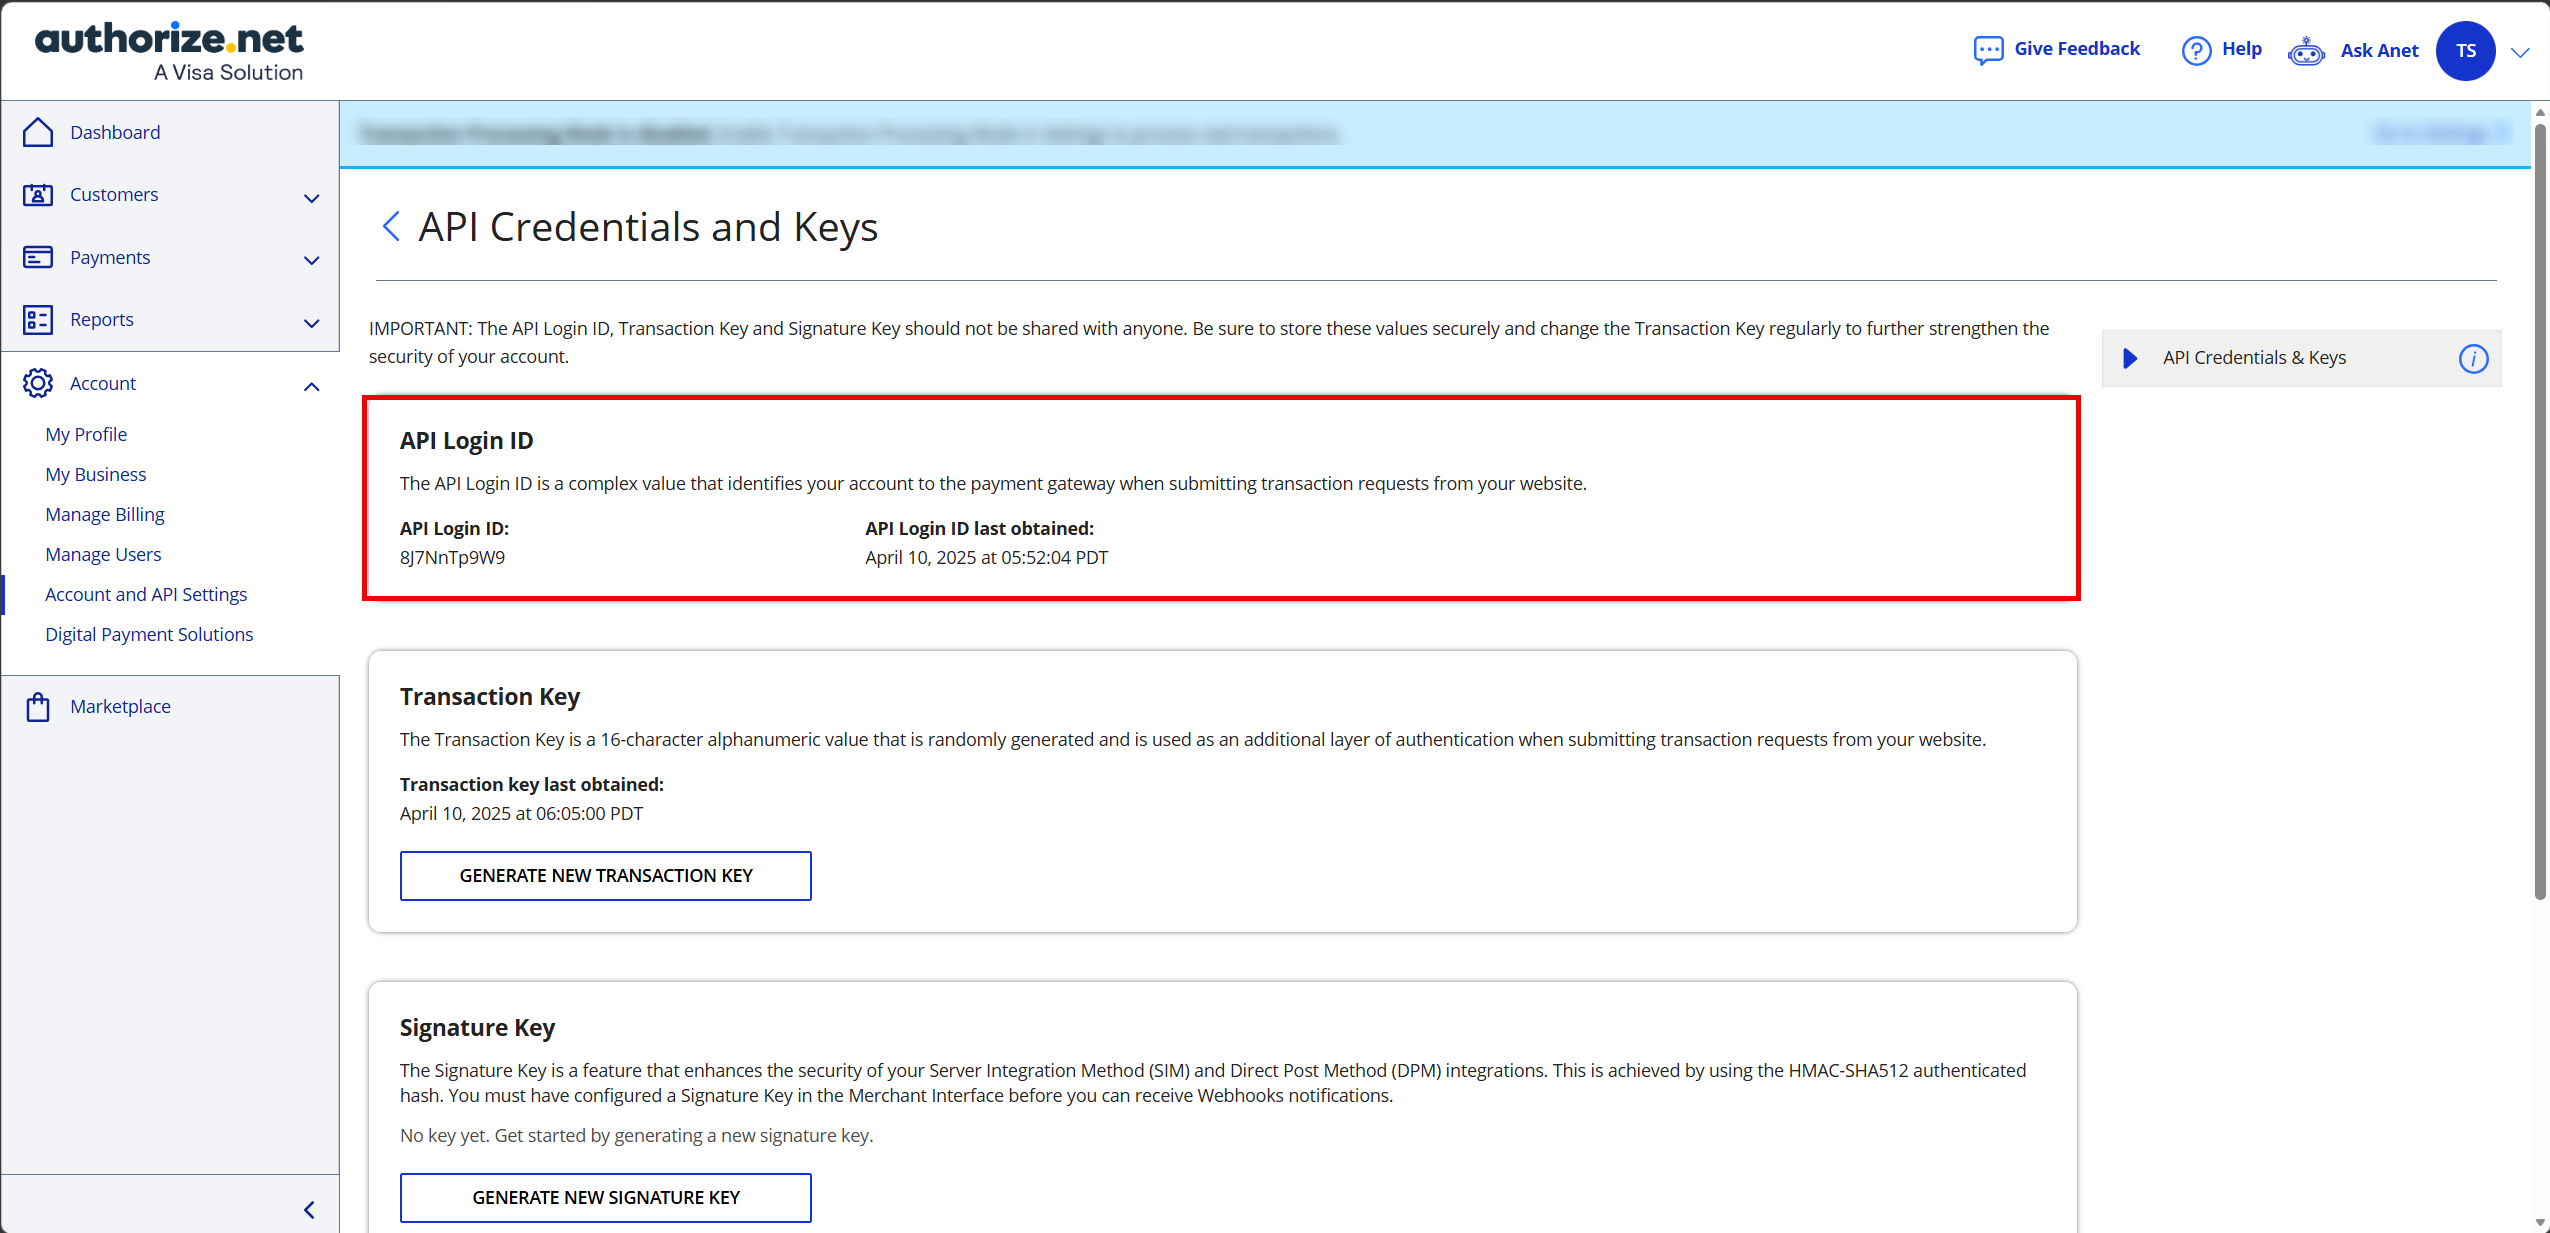
Document Your API Login ID:
Your API Login ID will be displayed. Make a note of it—you’ll need it during integration.
-
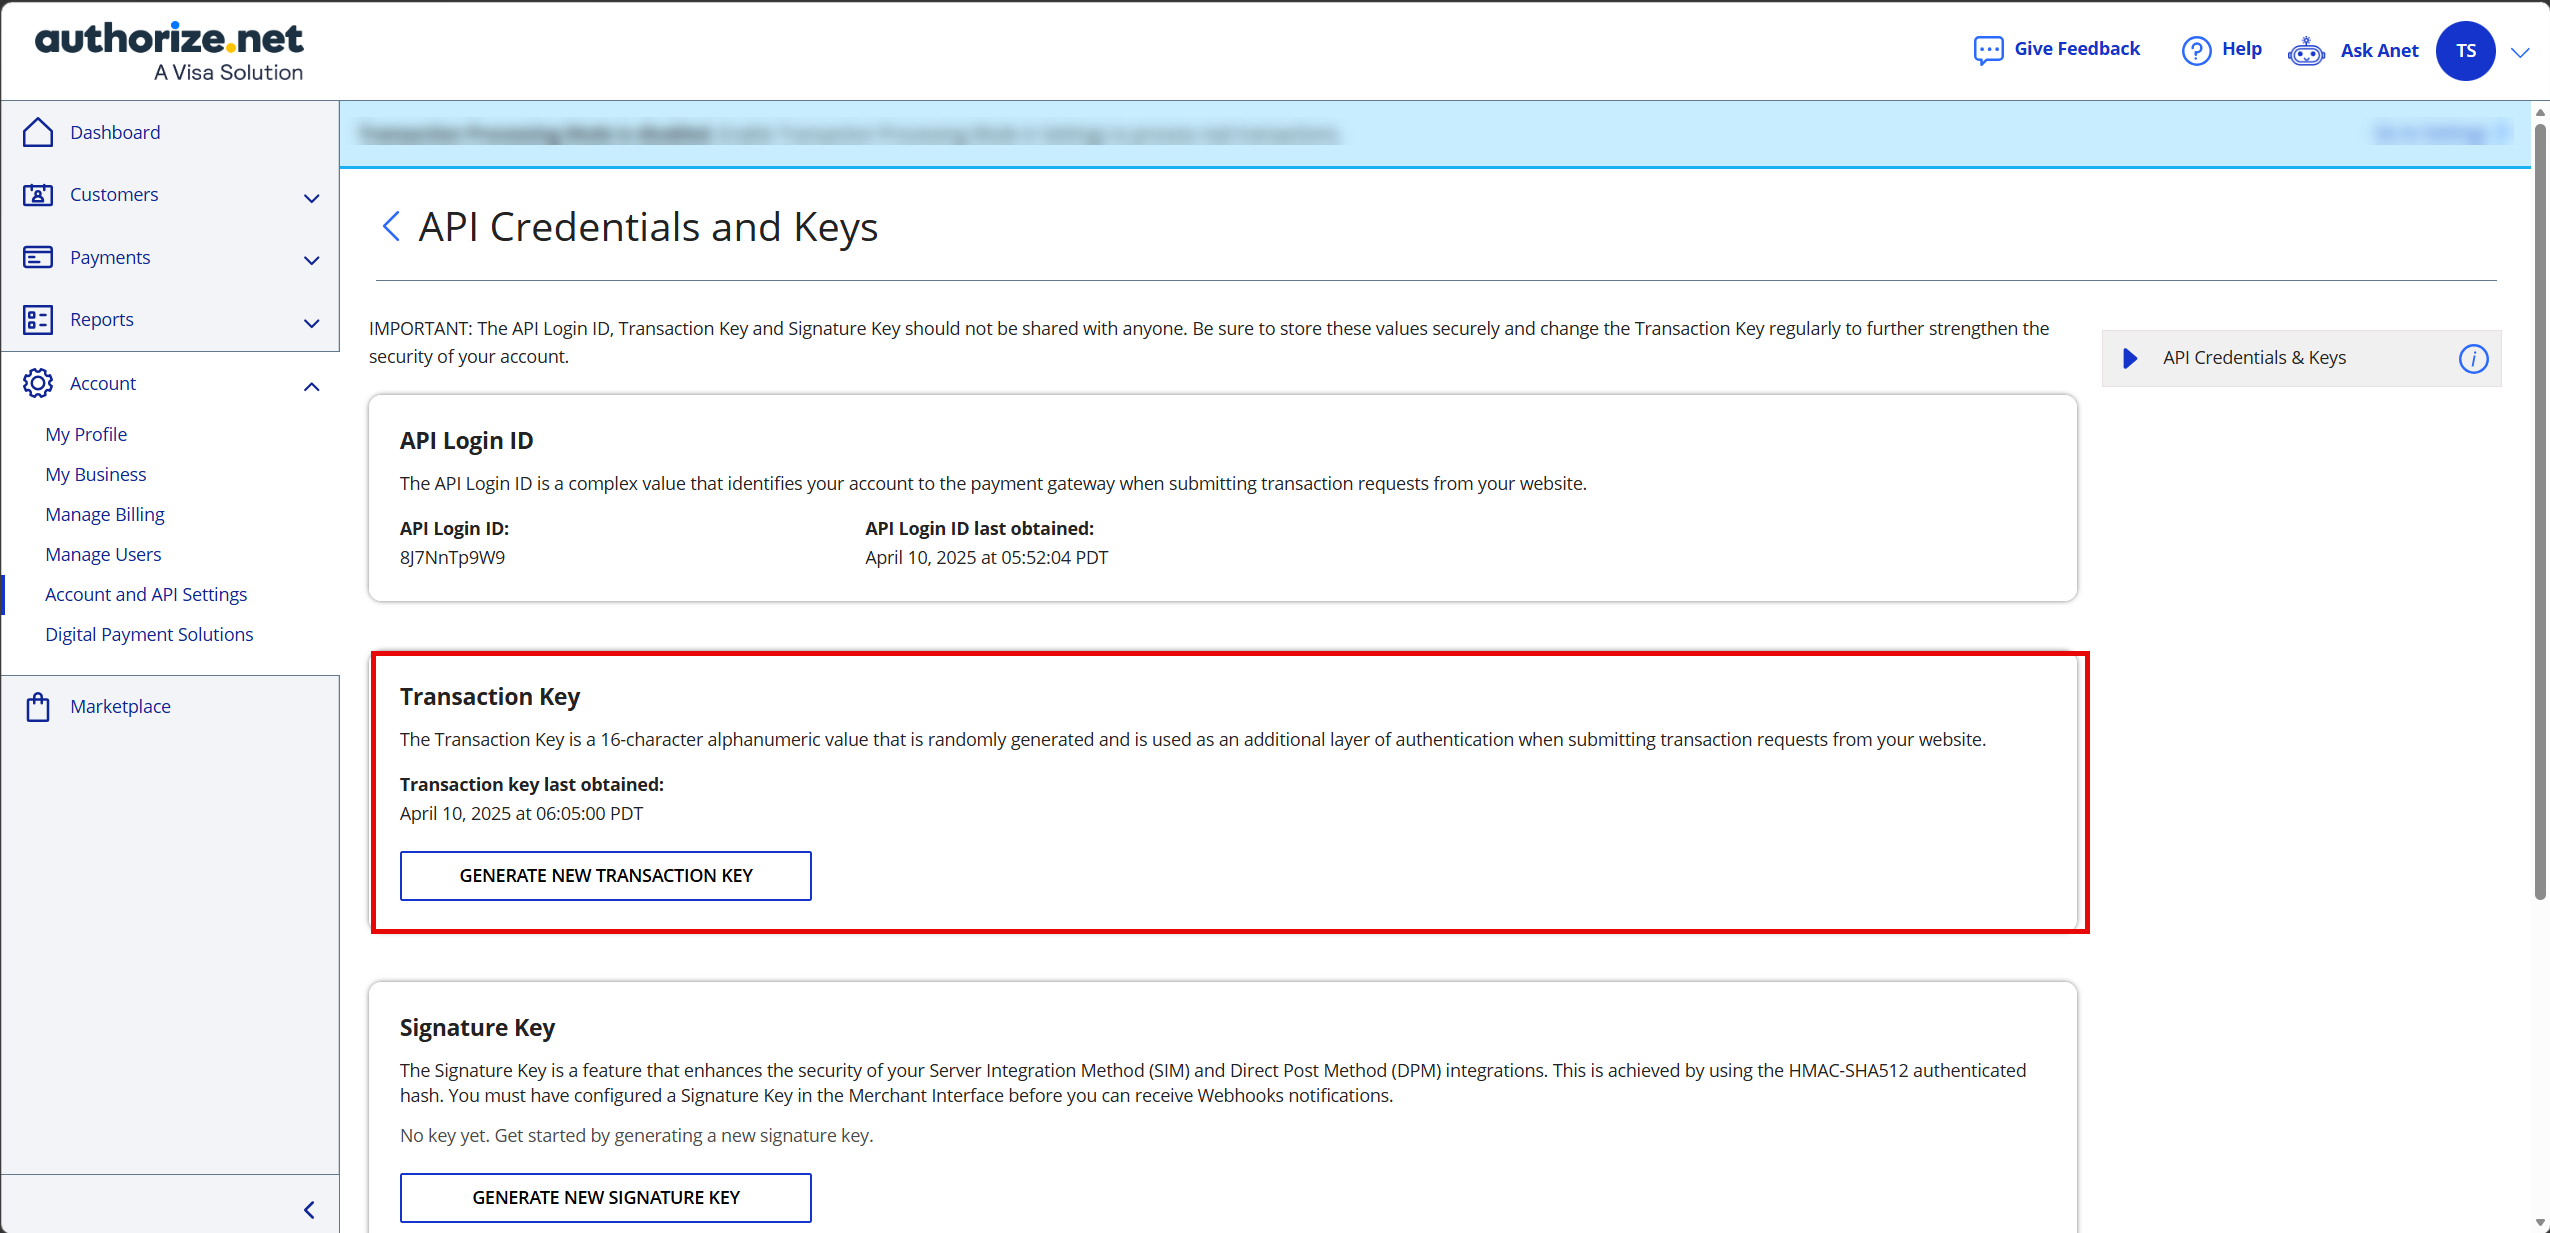
Generate a New Transaction Key:
Select GENERATE NEW TRANSACTION KEY on the screen.
Follow any prompts to validate your account.
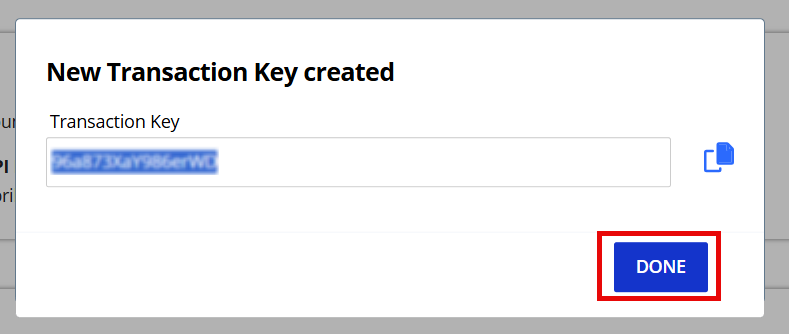
New Transaction Key created. Click DONE.
-
Important Security Note:
Copy and save your new Transaction Key in a secure location. This key will only be displayed once.
-
If you lose it, you’ll need to repeat these steps to generate a new key.
If you previously had an old Transaction Key, you could choose to disable it immediately during the generation of a new key, or the old key will be deleted after 24 hours.
Step 3: Configure the Relay Response (POST) URL
This step ensures that Authorize.NET can communicate payment results back to your Easybooking/TBS Portal.
-
Go to the Payments Tab:
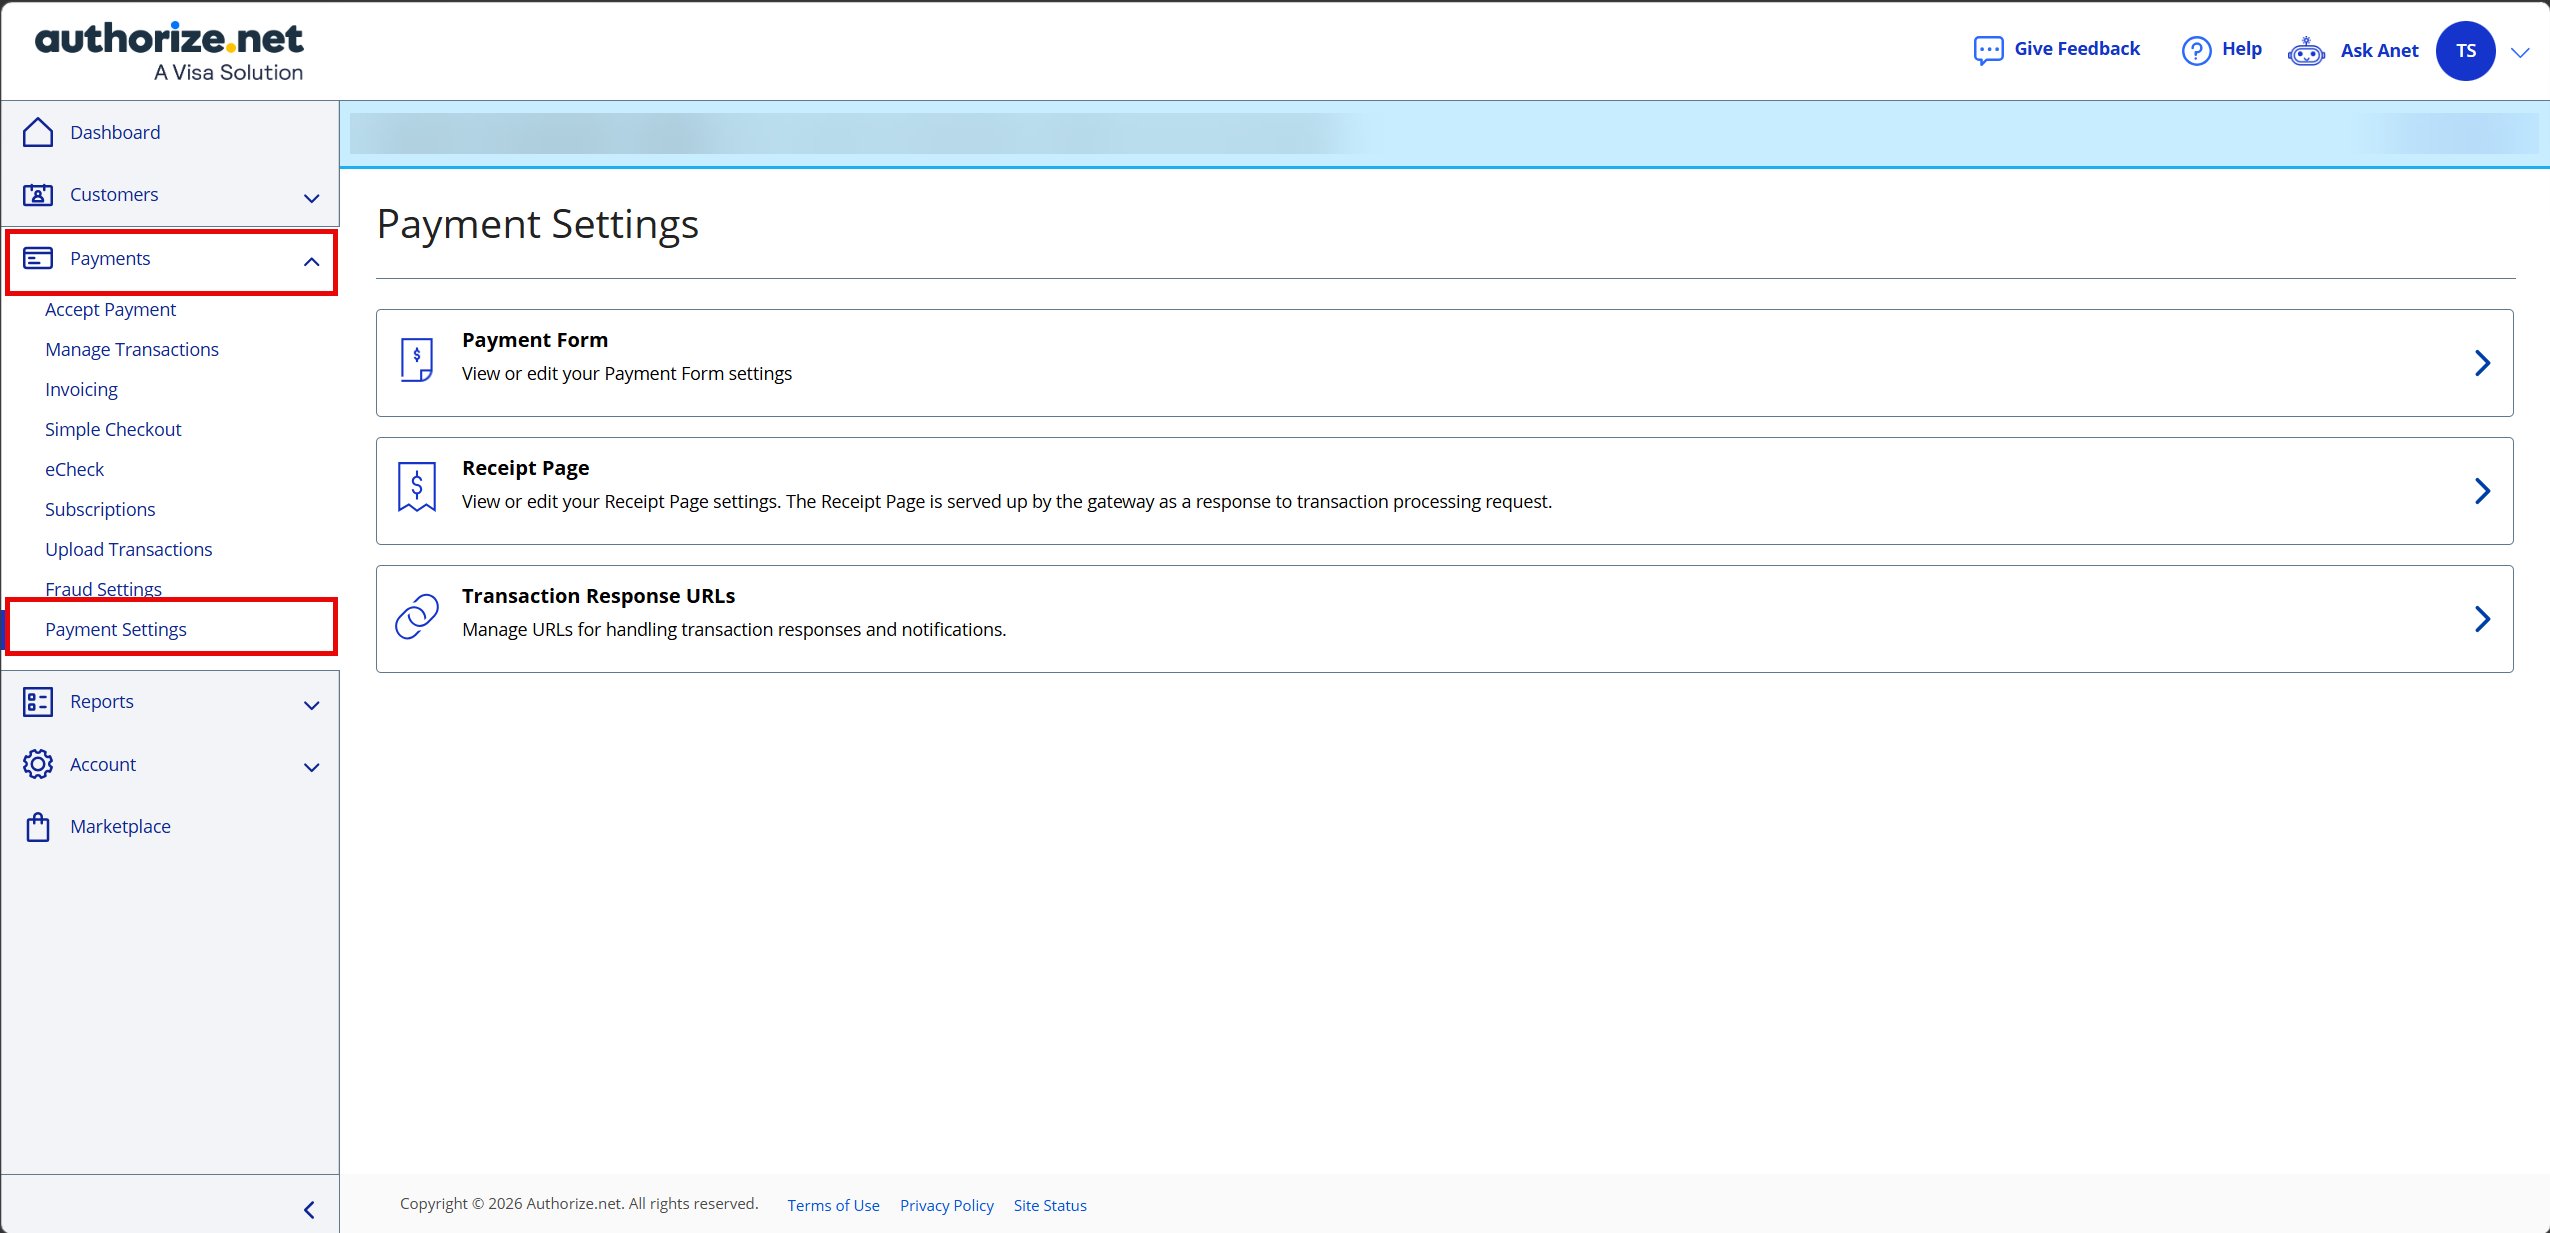
Click PAYMENTS in your Authorize.NET dashboard left dropdown panel and select Payment Settings.
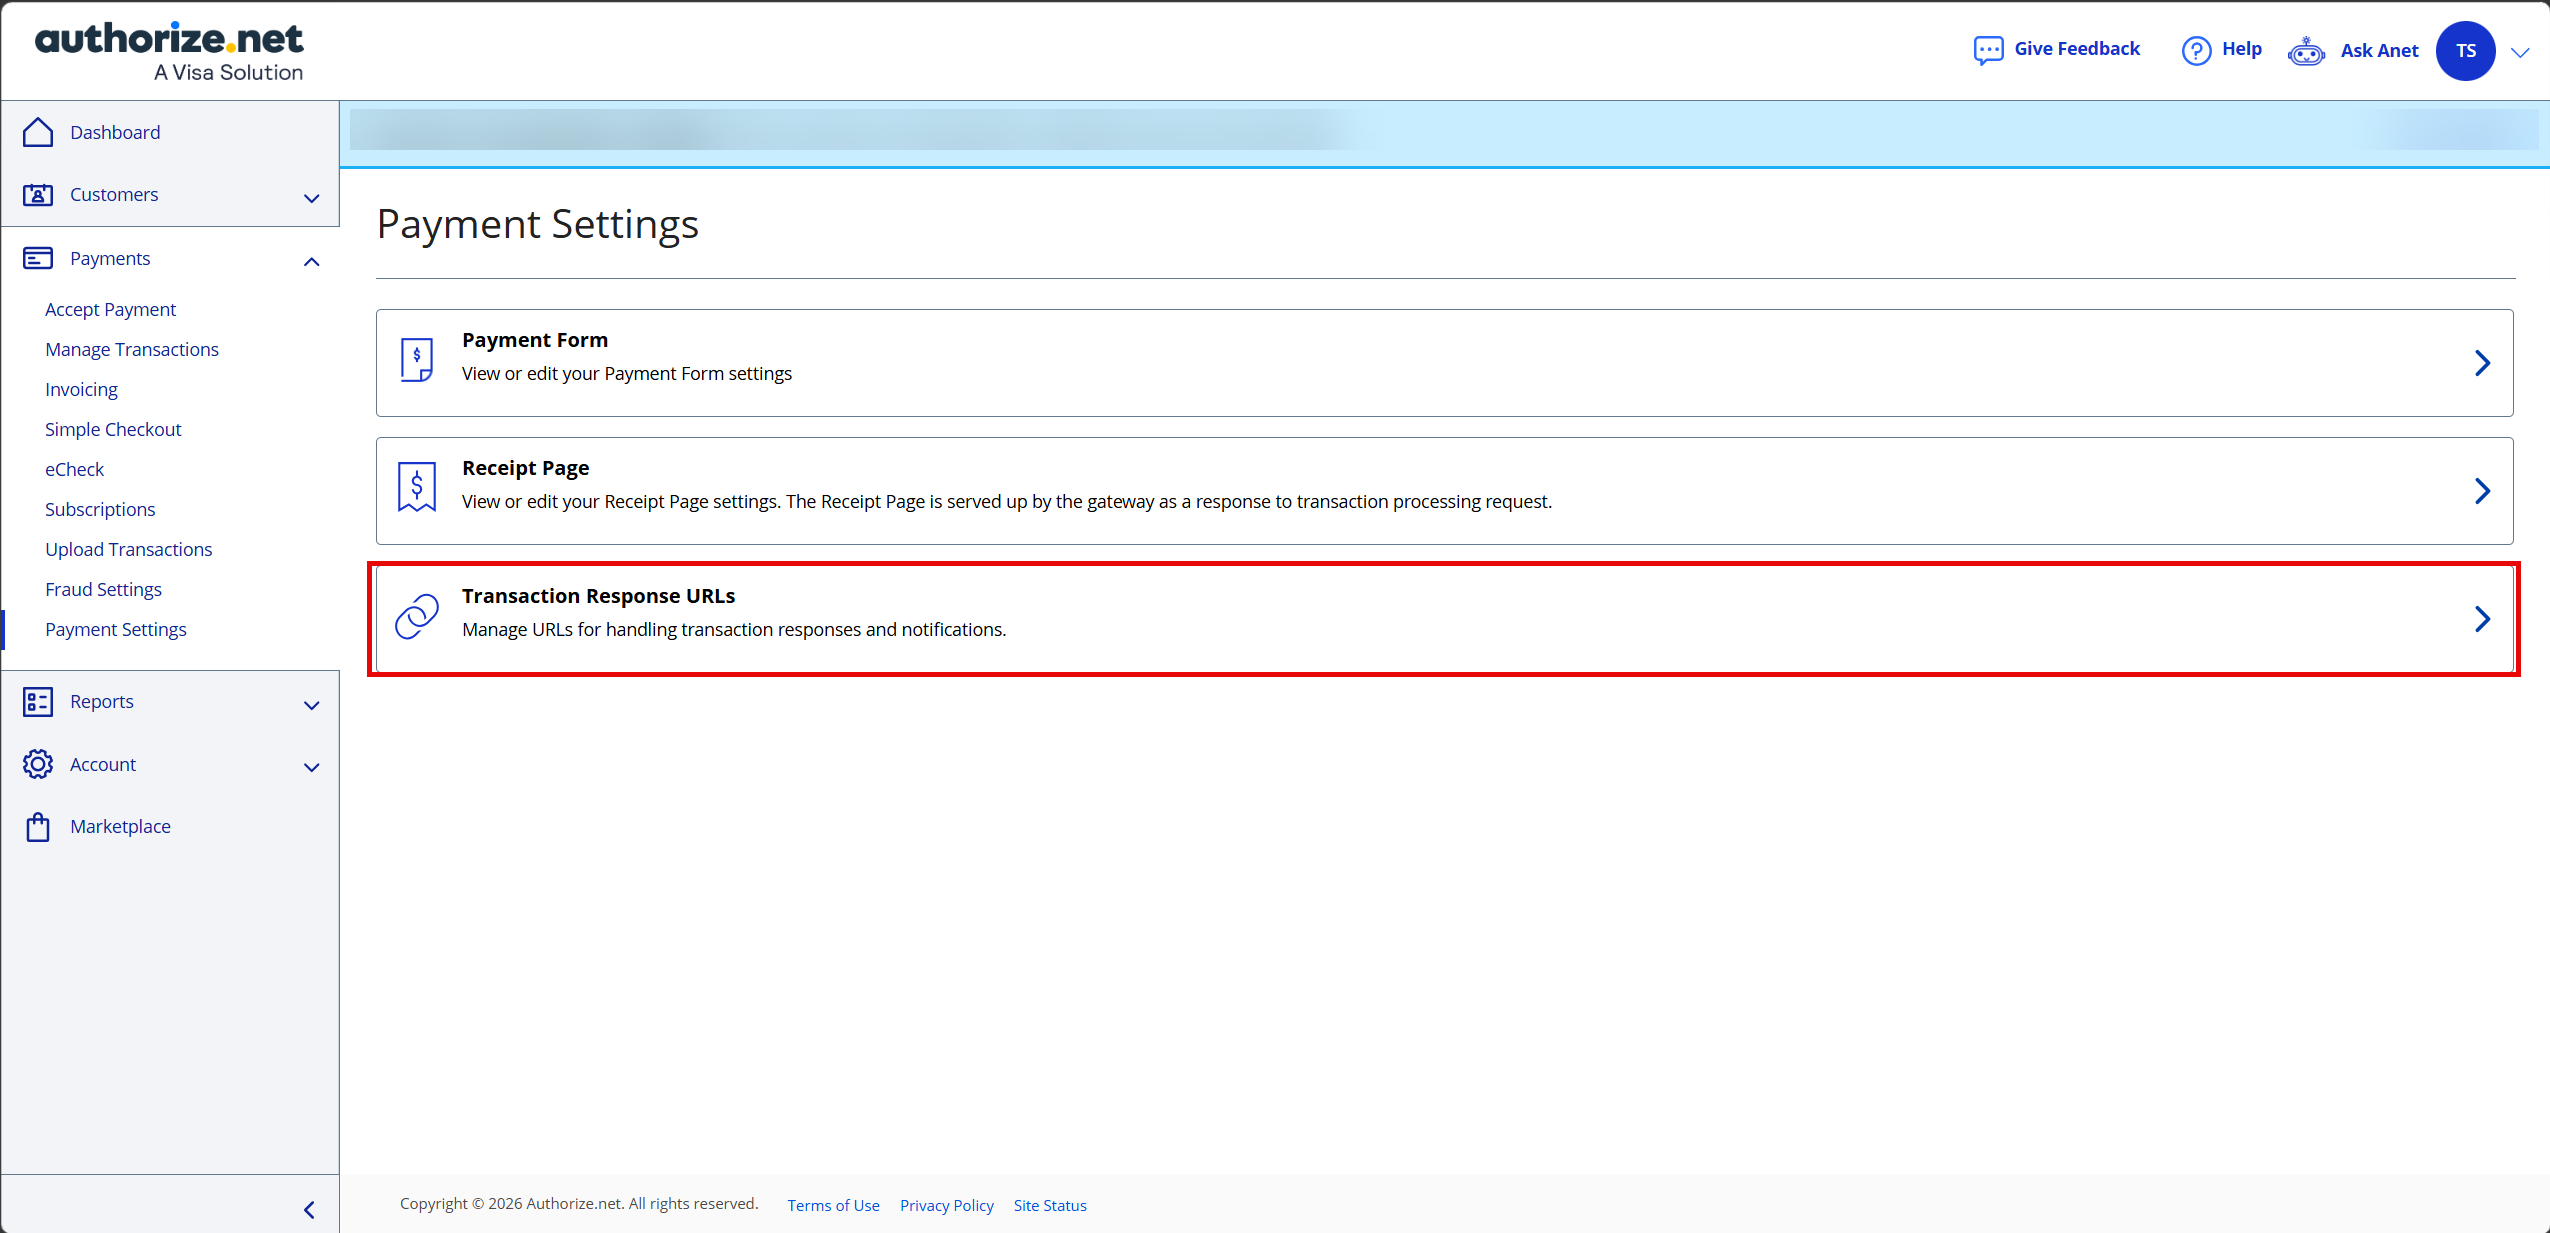
Select Transaction Response URLs.
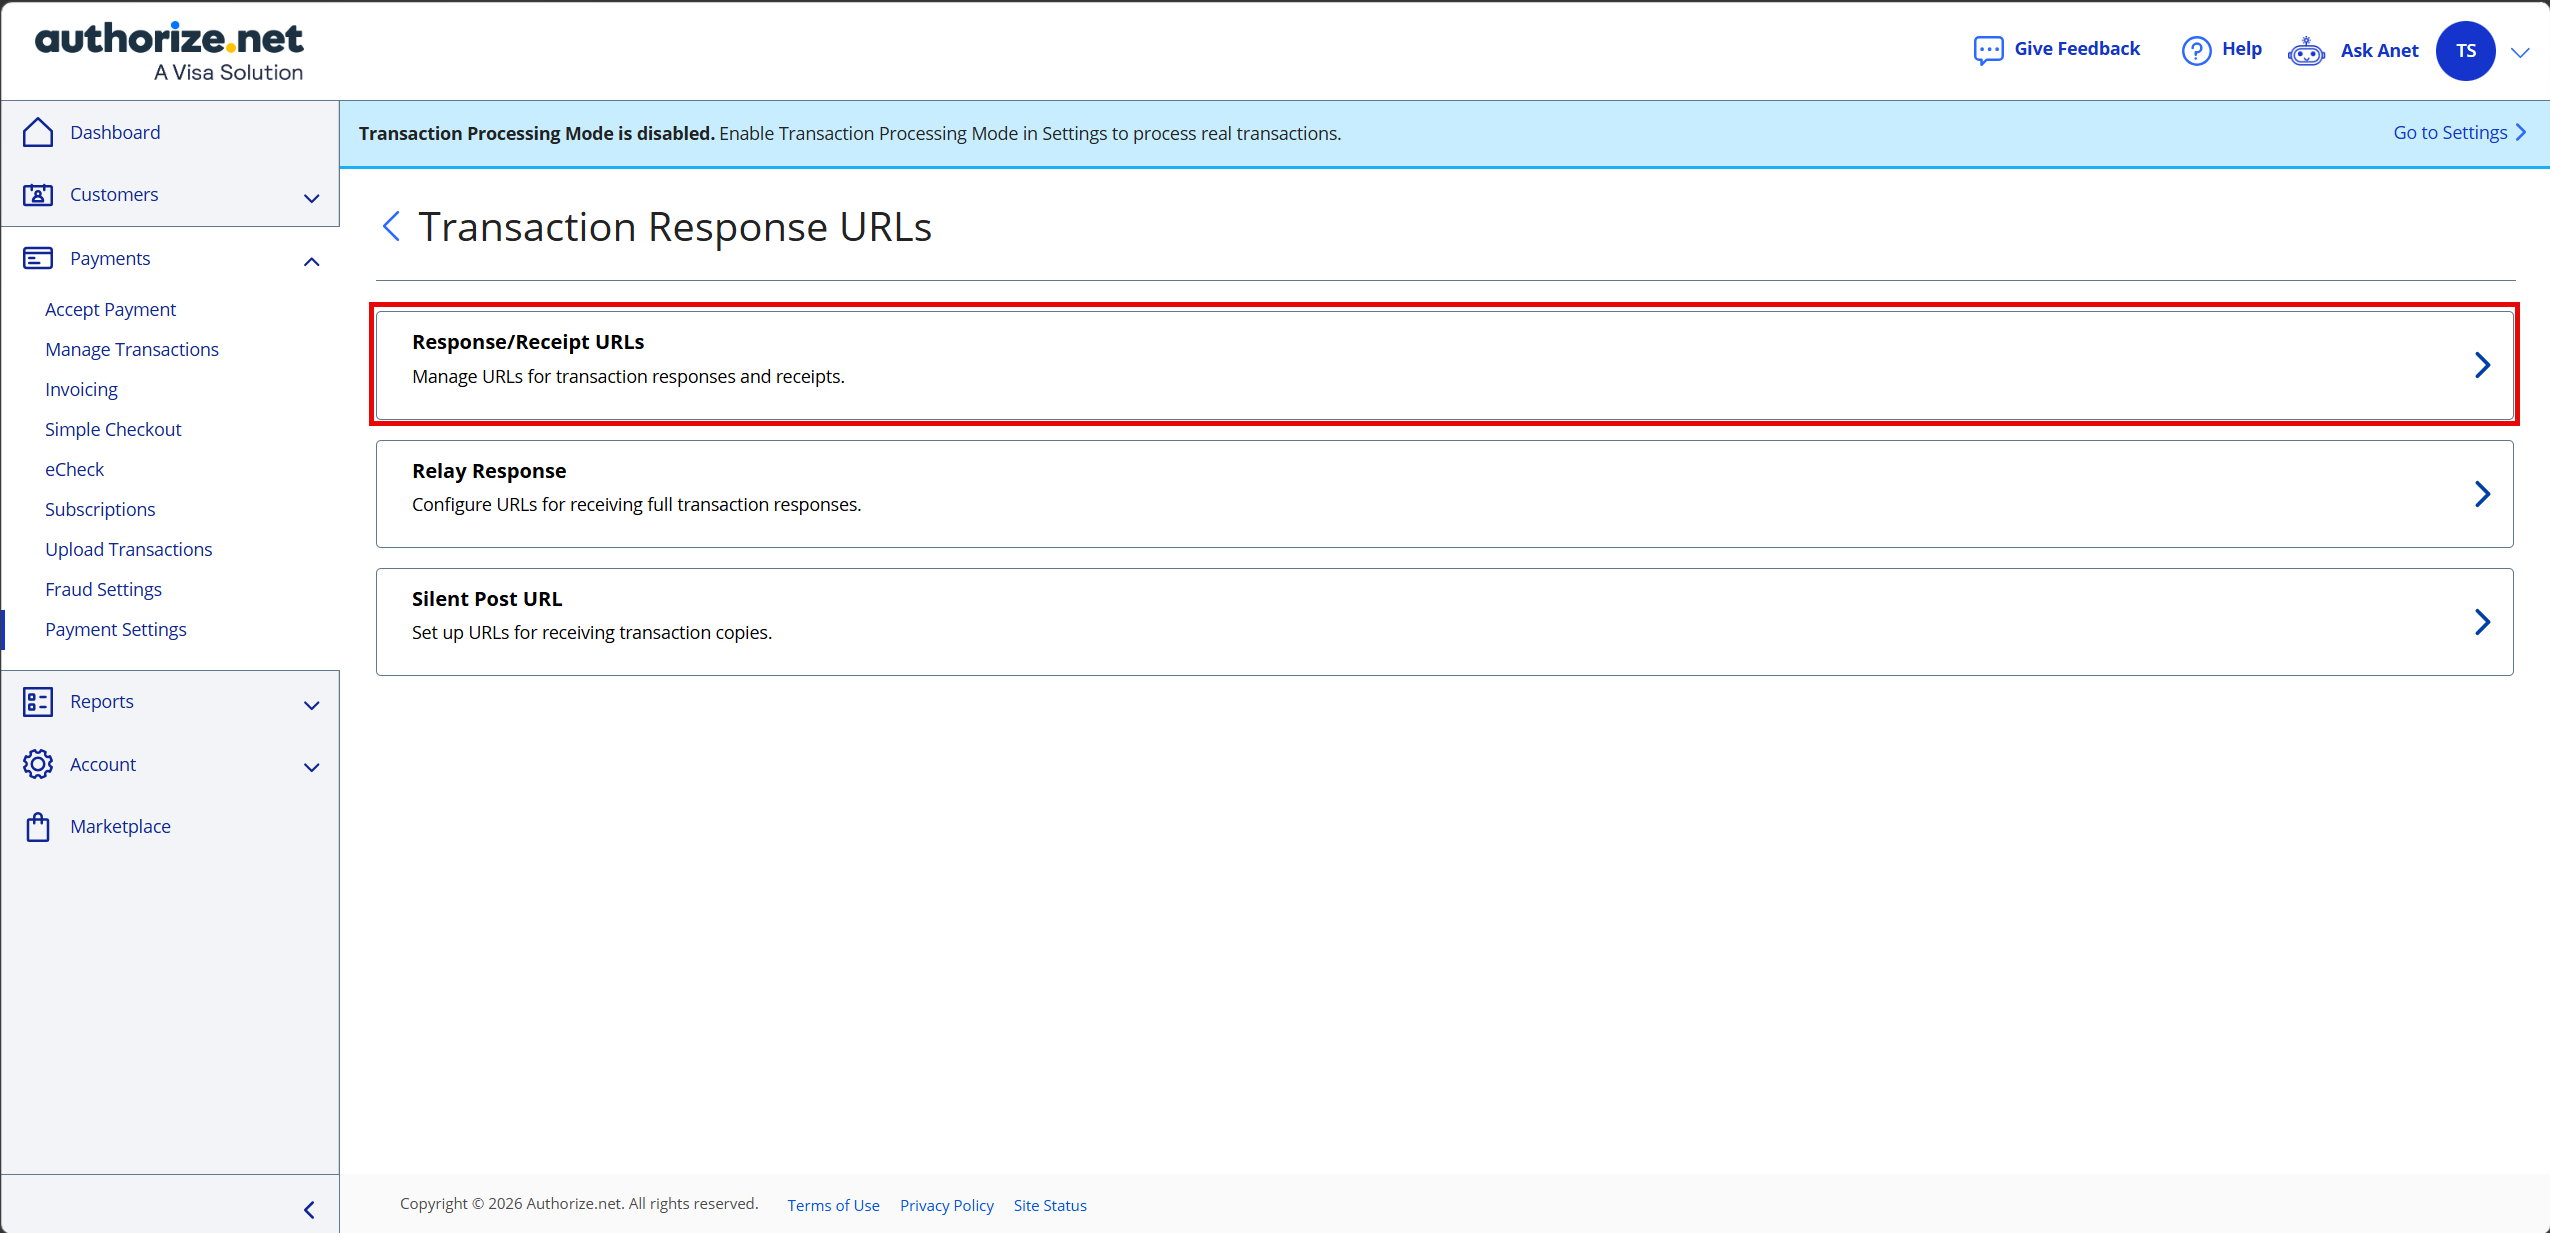
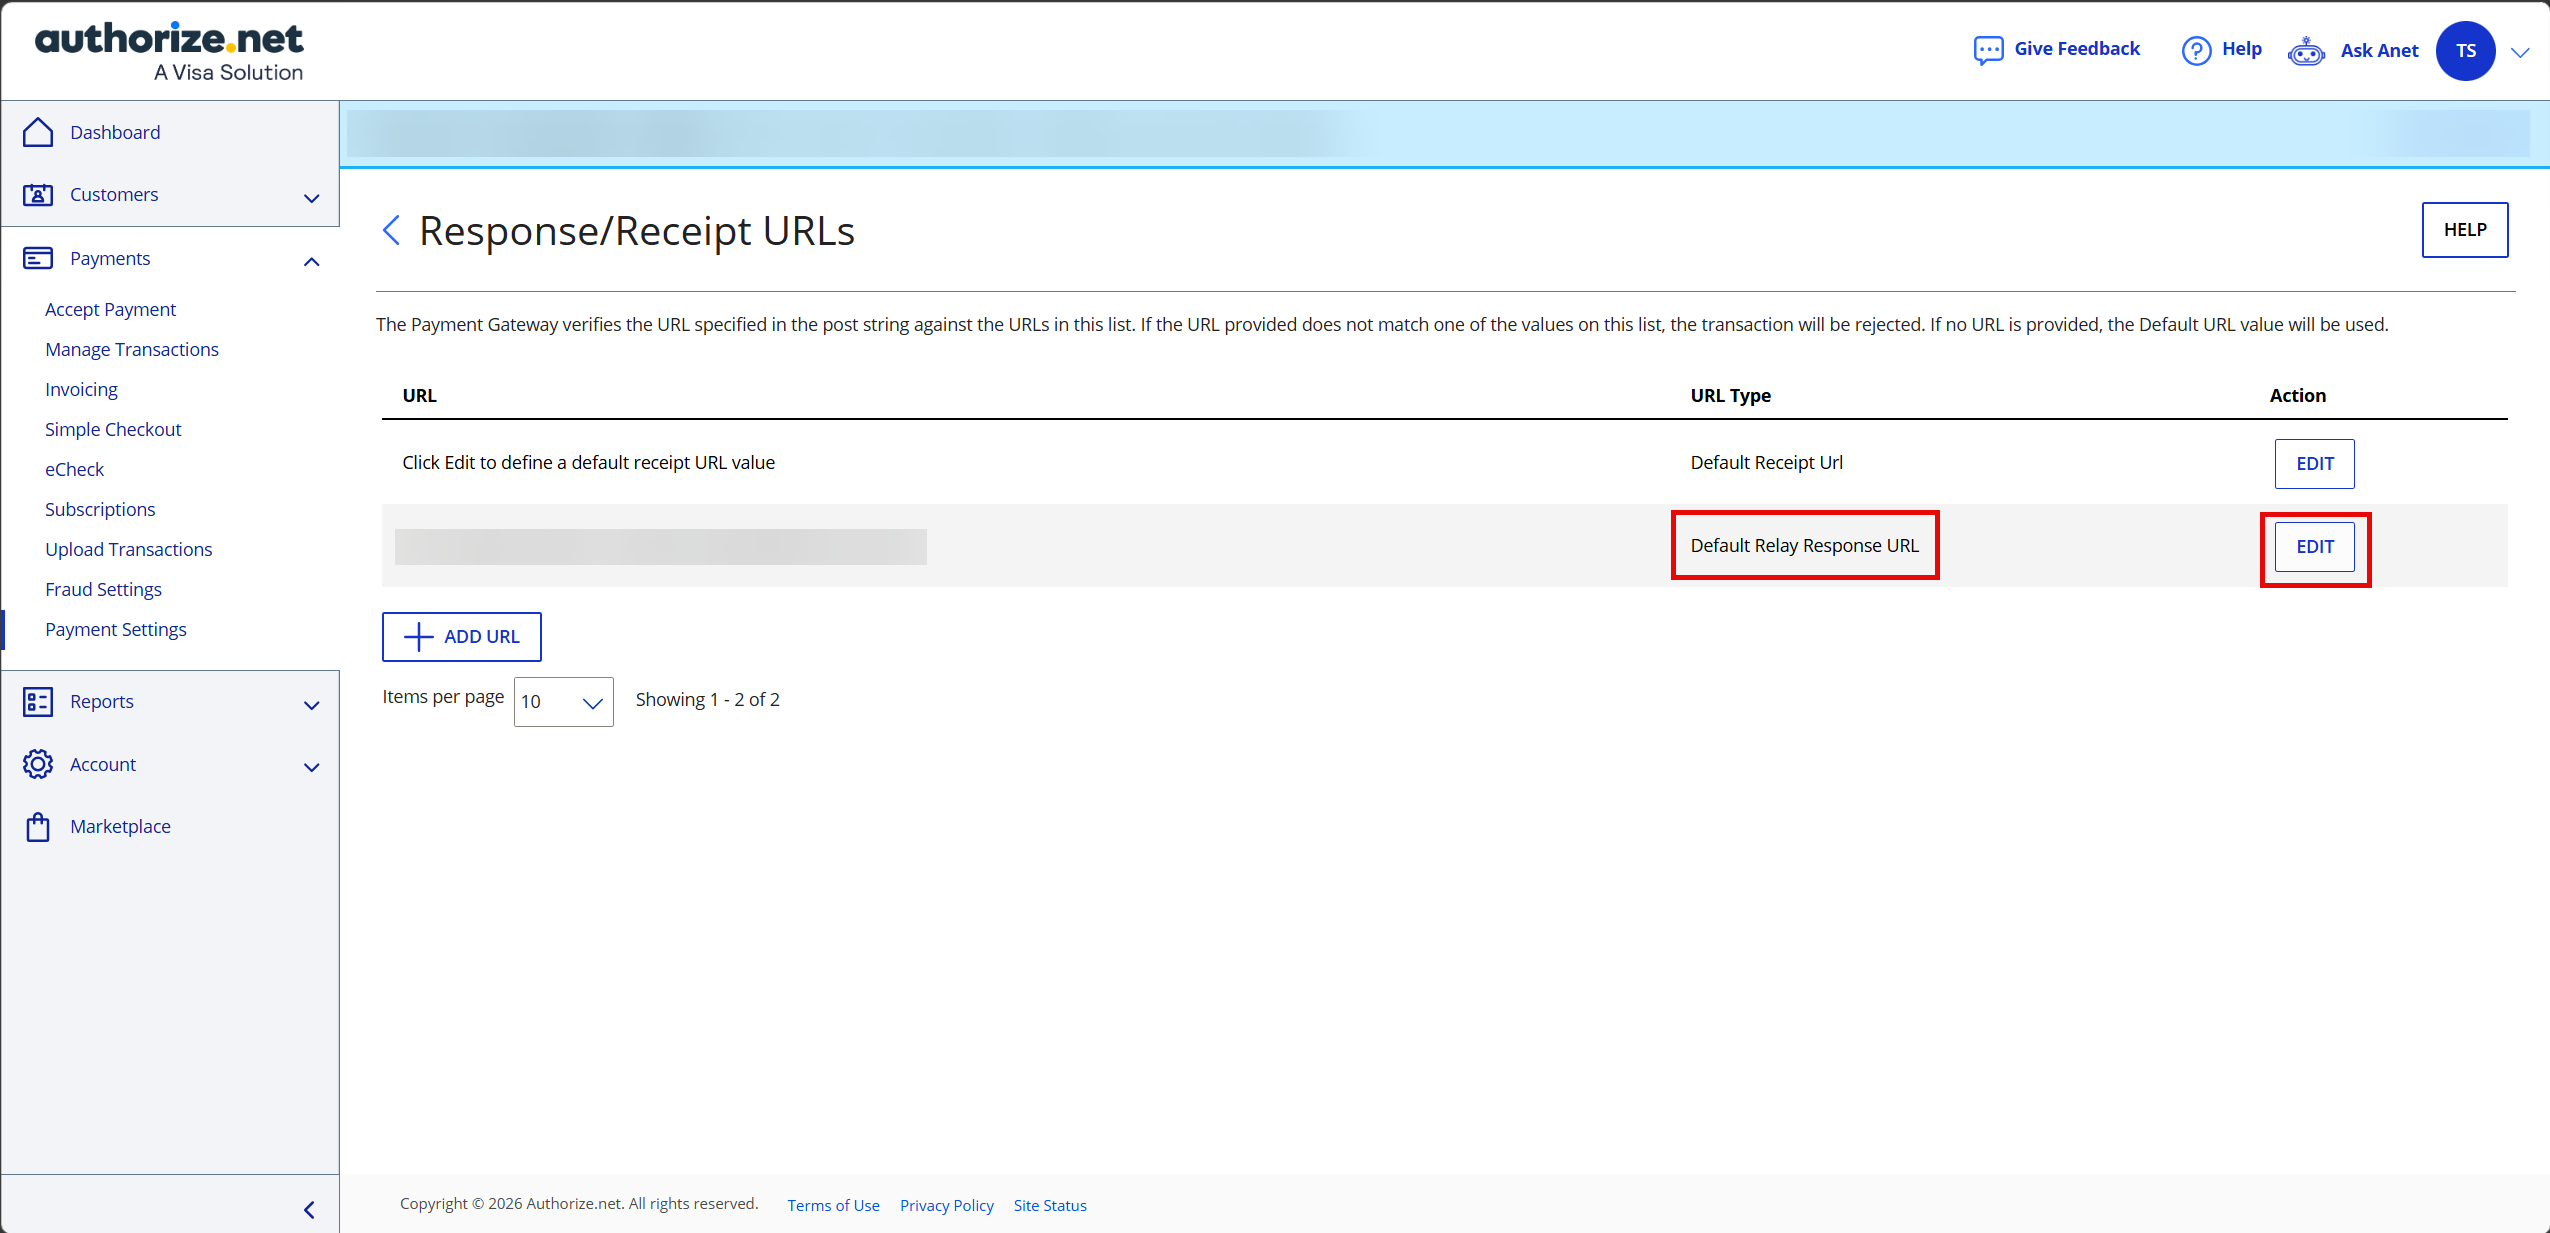
Select Response/Receipt URLs.
-
Edit the Default Relay Response URL:
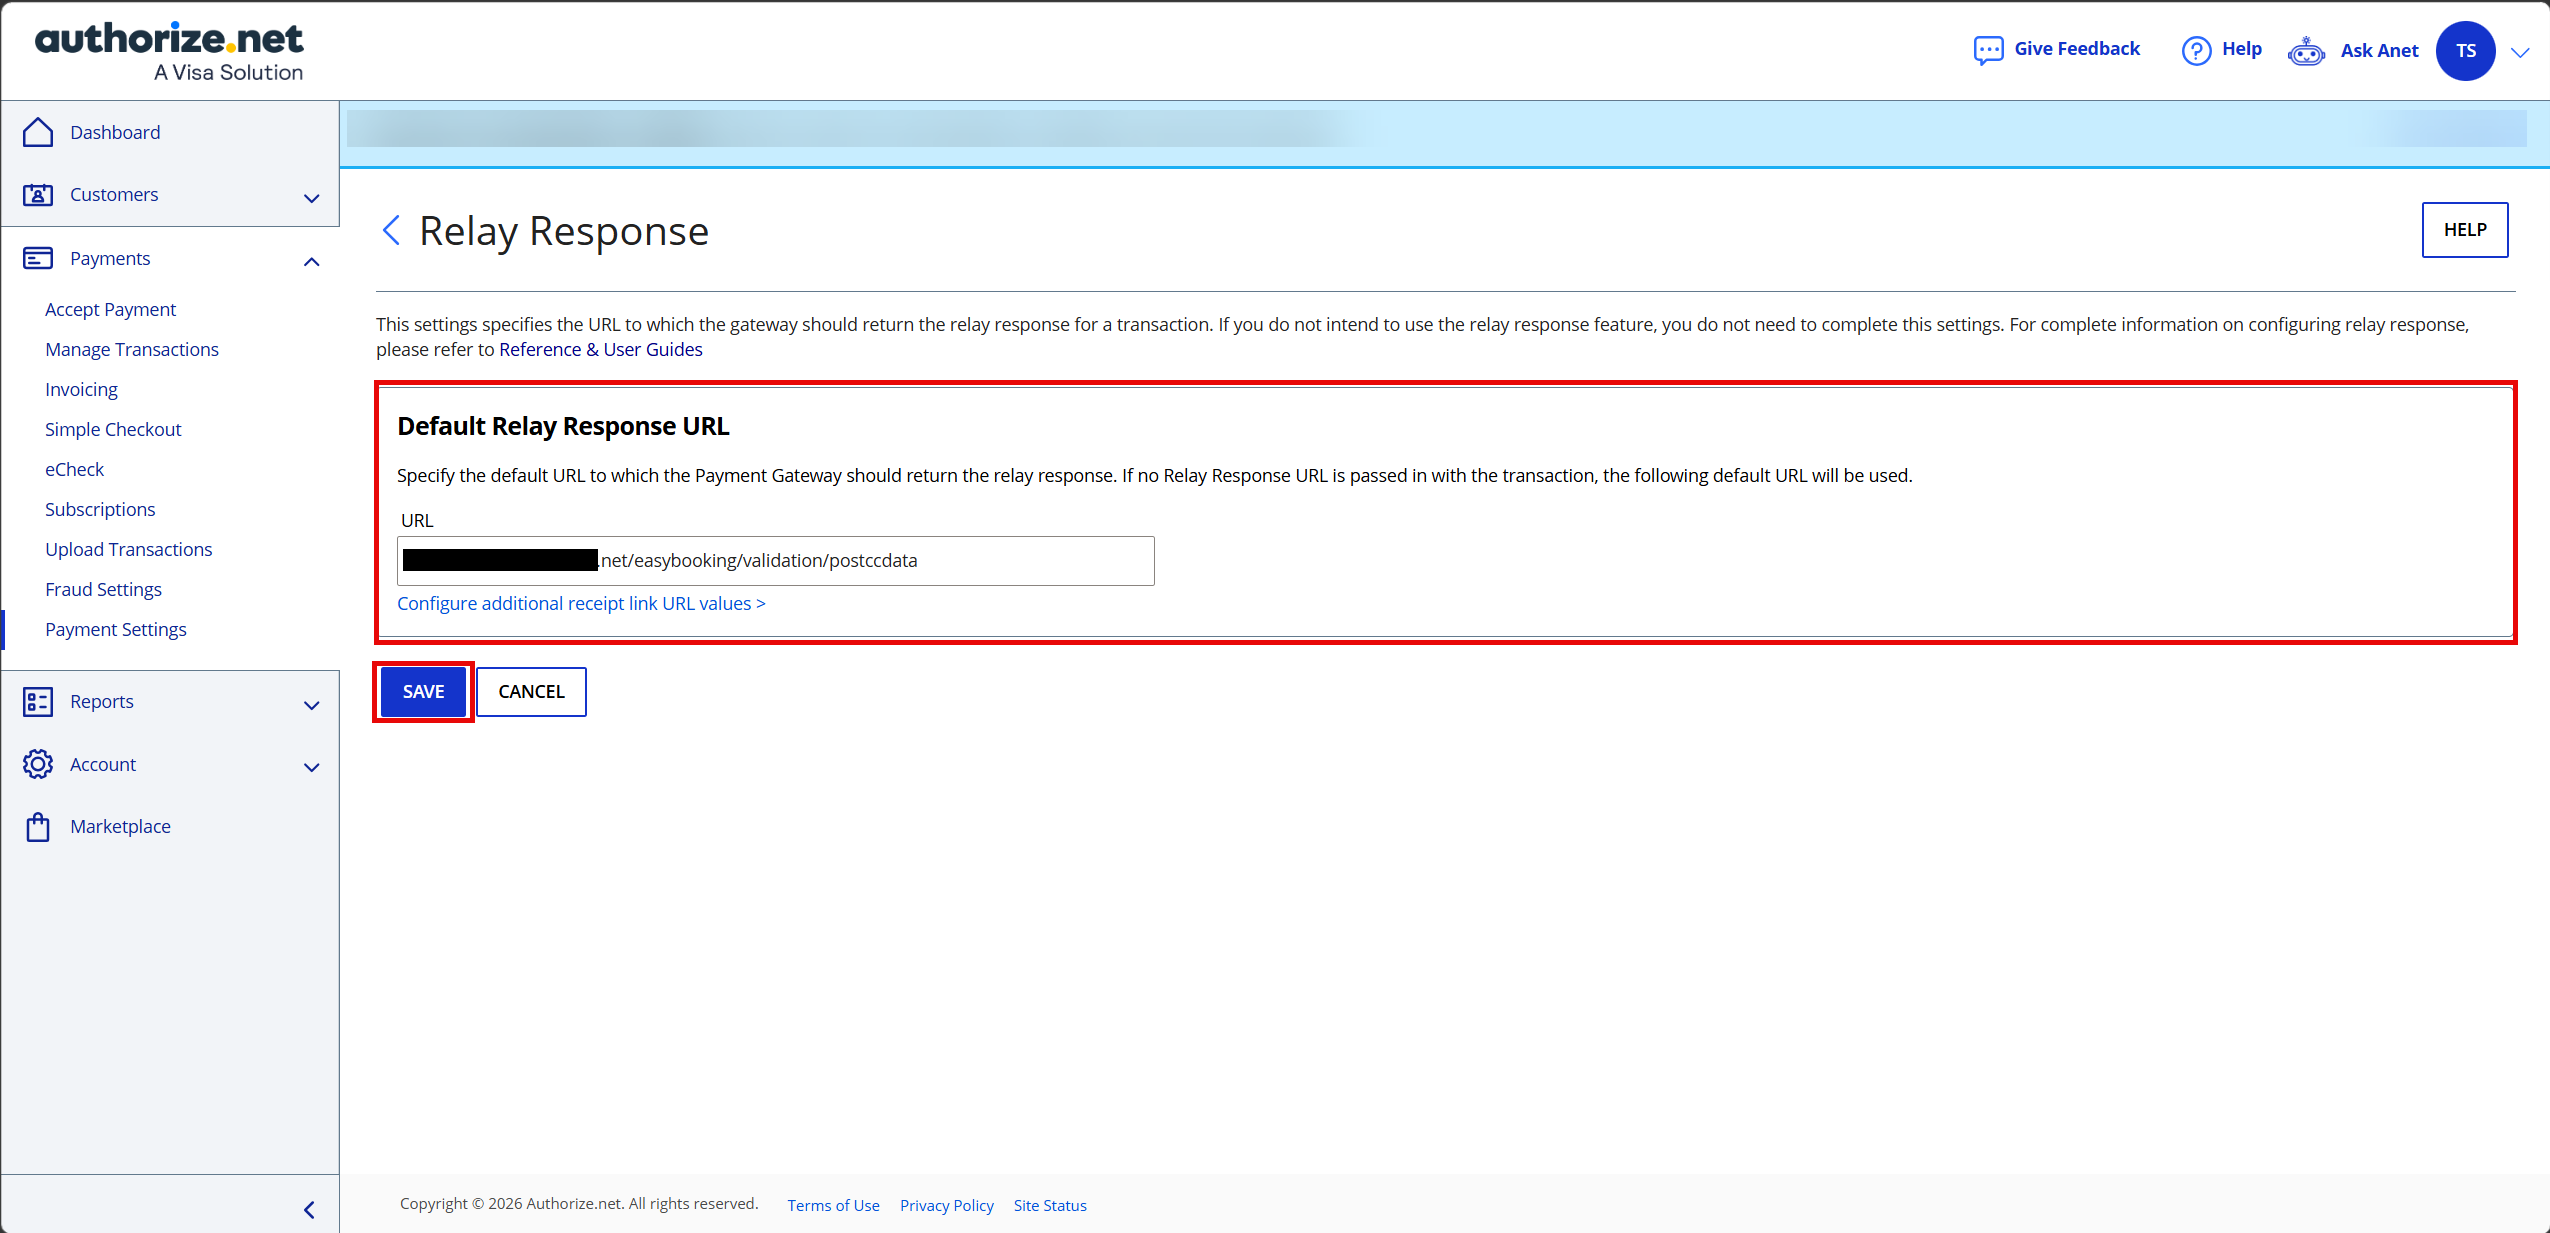
Find the entry labeled Default Relay Response URL and click EDIT next to it.
Enter your system’s external relay response URL in this format:
https://YOUREXTERNALURL/easybooking/validation/postccdataBe sure to replace YOUREXTERNALURL with your actual external URL.
Click SAVE.
Tips and Reminders
Keep your API Login ID and Transaction Key secure. These credentials give access to your payment gateway.
Document everything. It’s a good idea to record your configuration details (not just in your browser), so you have them handy for troubleshooting or future updates.
Double-check your URLs. Typos in your external URL or Relay Response URL can prevent payment notifications from being delivered correctly.
Disable unused keys. If you generate a new Transaction Key, always disable the previous one to maintain security.
Next Steps
Once you’ve completed these steps, your Authorize.NET account is ready to work with Easybooking/TBS Portal. You can now move on to testing the payment process or integrating with your portal as needed. If you run into issues, consult the Authorize.NET documentation or reach out to your portal administrator for support.
That’s it! With these settings in place, you’re all set up to accept payments securely and reliably through Authorize.NET and Easybooking/TBS.