How to Setup Authorize.NET for easybooking fees/fines
How to setup Authorize.NET to be used as the payment method for Fees/Fines Payment through Easybooking/TBS Portal.
START: Log into your Authorize.NET account and follow the screens below:
Must haves:
The first step is to make sure you have an external URL for this system. Without this, you cannot continue. Once you have this you can proceed with the authorize.net setup.
CREATING API TRANSACTION KEY
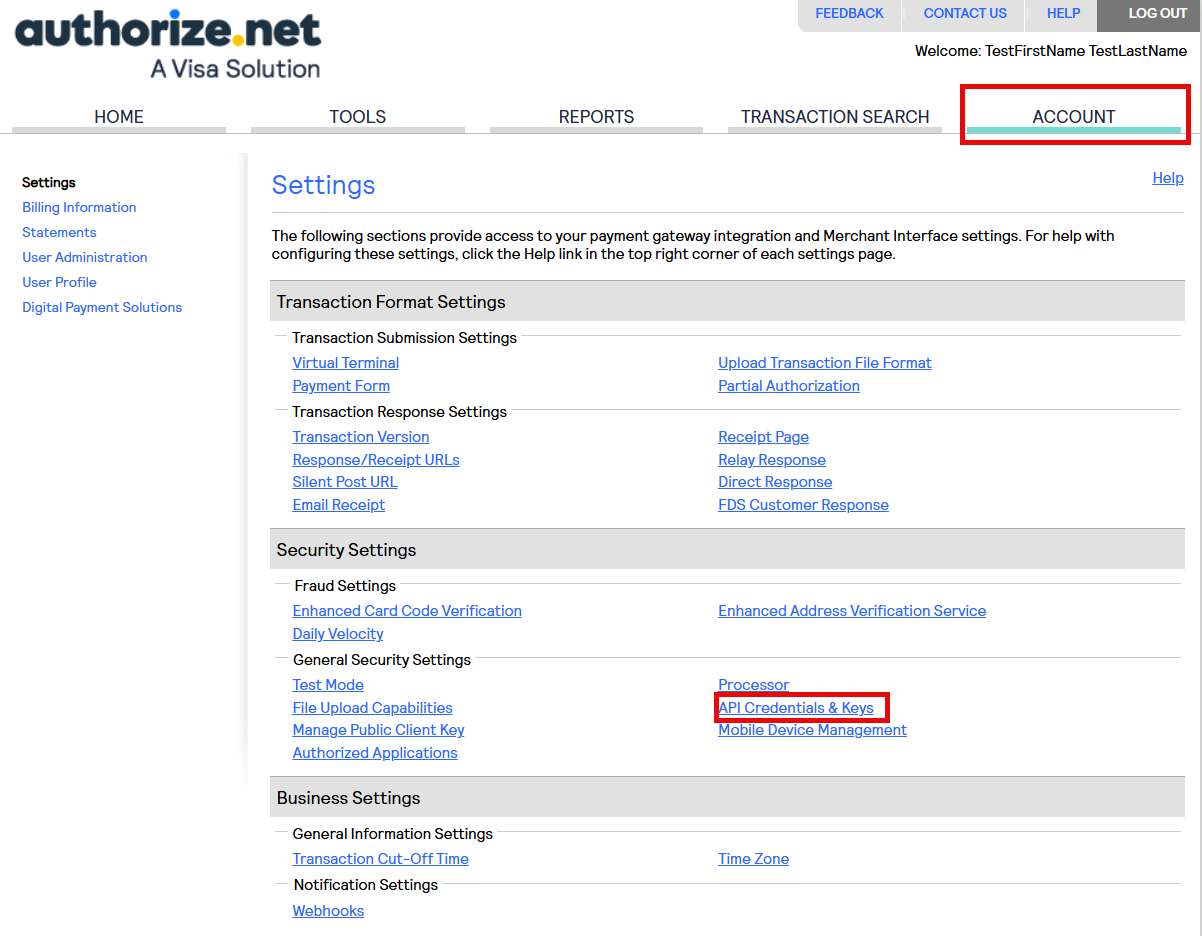
- Click on the ACCOUNT tab and then ‘API Credentials & Keys’ under the Security Settings.
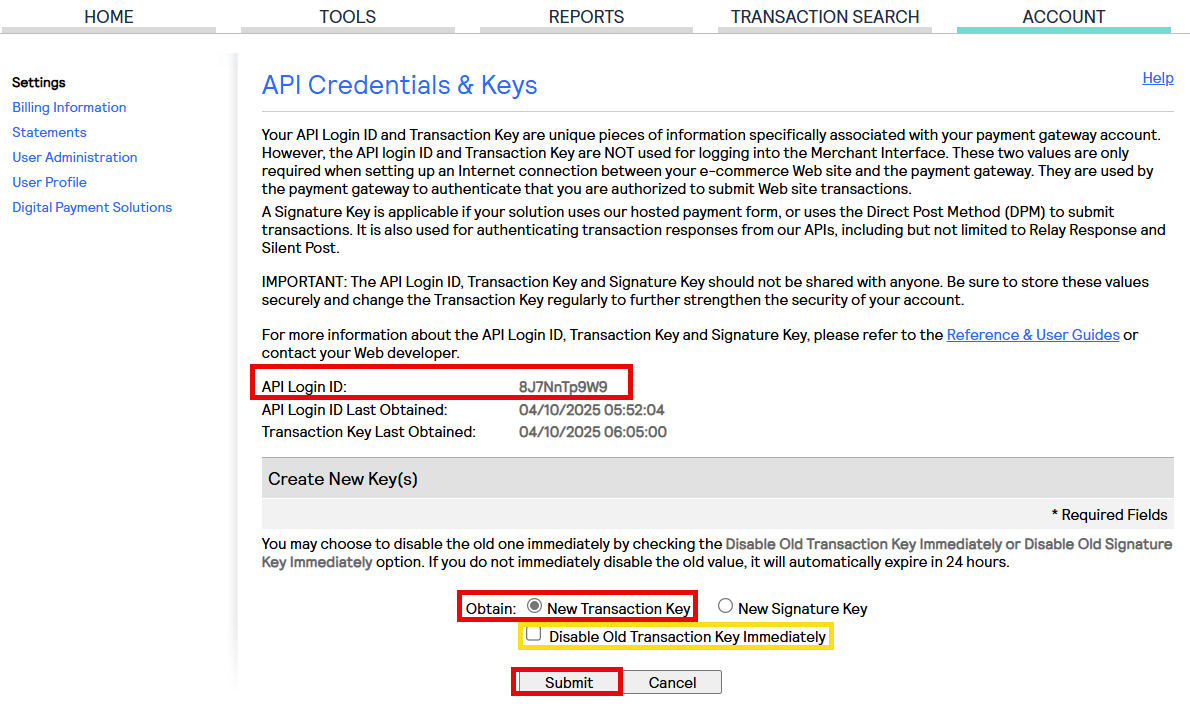
- On the next screen, document your API Login ID as this will be needed. This will always show on this screen so you can always go back and obtain it. Next, select 'Obtain: New Transaction Key’ and hit SUBMIT. If you already have an API Key that was generated, you need to disable Old Transaction Key.
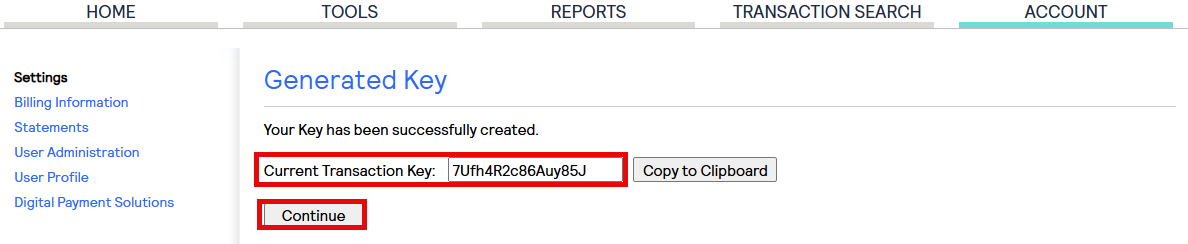
- When the NEW TRANSACTION KEY is created, you will want to copy it somewhere safe. (Note: you must document the information from this screen as they do not show the Transaction key anywhere else after you hit continue for security reasons). If you lose this, another key wil have to be generated by starting this process over.
CONFIGURING POST URL
- Click on the ACCOUNT tab and then “Response/Receipt URLs” under the Transaction Format Settings.
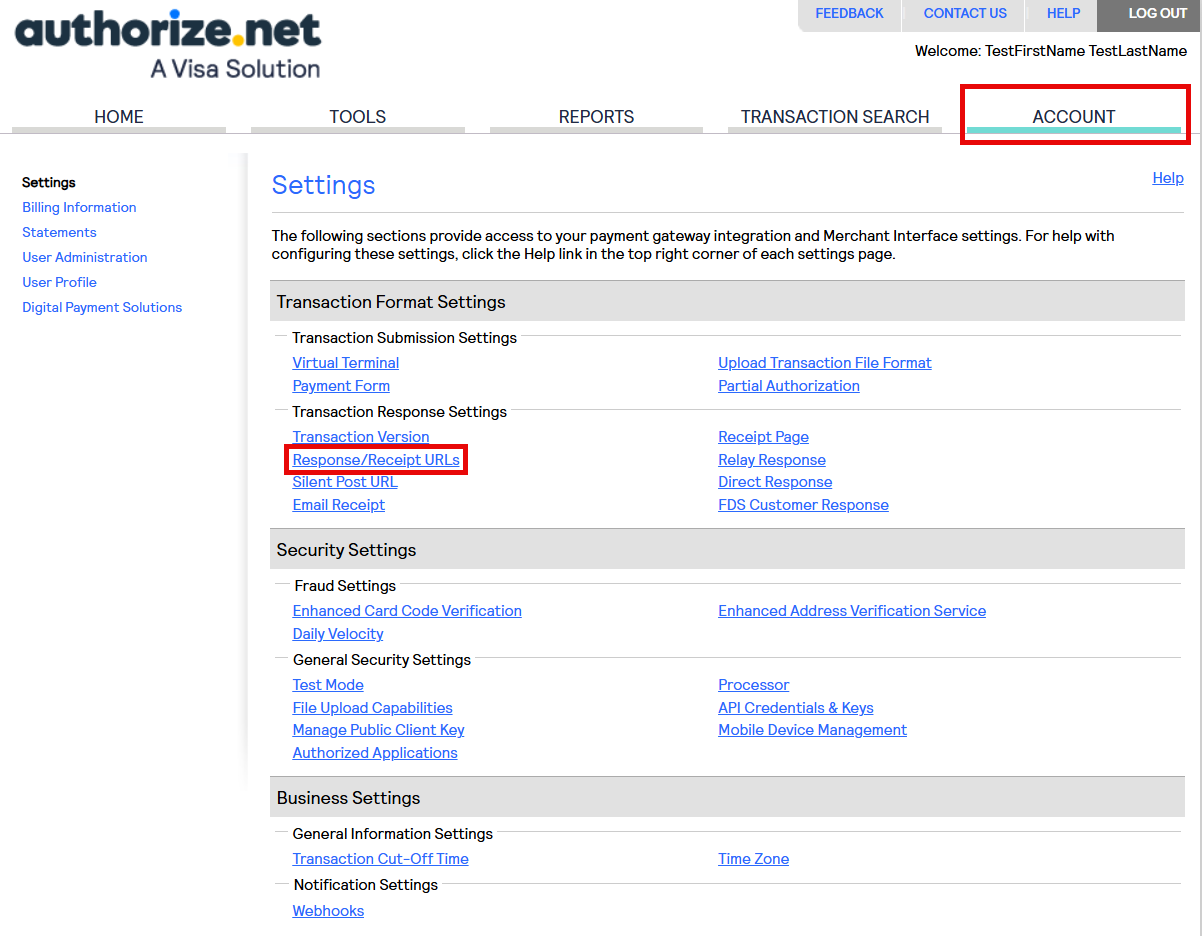
- From here, click EDIT next to the Default Relay Response URL and put in: https://YOUREXTERNALURL/easybooking/validation/postccdata
