
How to Configure cPad and PaperCut Device settings
CPAD CONFIGURATION MENU
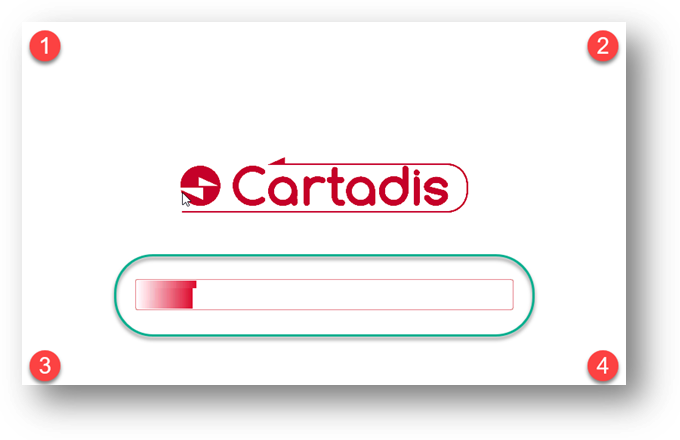
After rebooting, you will see the "CARTADIS" logo and then a white screen before seeing the 2nd "CARTADIS" logo. At that time, you will need to push the four corners of the screen one at a time (Top Left, Top Right, Bottom Left, Bottom Right).
*CLICK HERE - How to access the "Configuration Menu" on the Caratdis Cpad Video
Once you do this, you will be prompted for a password. This default password is ‘23468’.
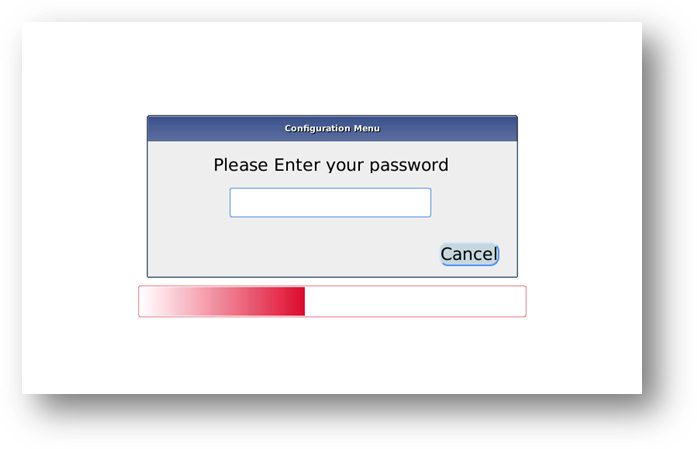
This will then bring you to the configuration screen.
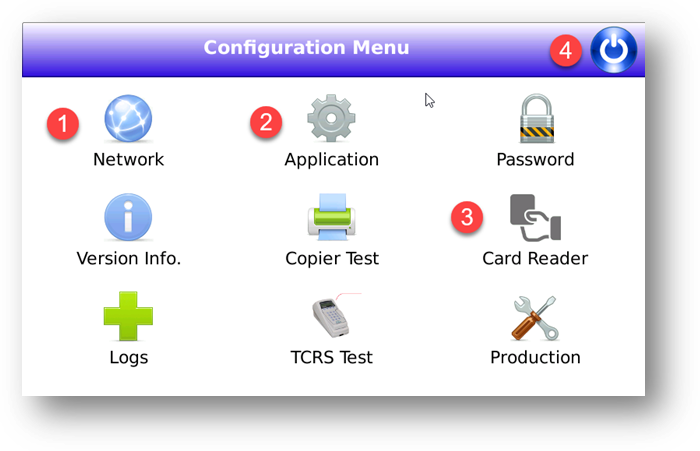
Configuration Menu Option
*CLICK HERE - How to access the "Configuration Menu" on the Caratdis Cpad Video
- NETWORK: This tab is to setup the static IP on this device.
- APPLICATION: This is where you set the server IP, and the cPad name.
- Application server: PaperCut Primary Server IP address
- cPad Name: name that will display under the device tab under the PaperCut Admin Portal. This should always start with ‘cpad-‘ followed by the branch name. (ex: cpad-main)
- SAVE and TEST. From here you can also test the connection to the server. If this fails, the static IP is either wrong, or cannot talk back to the server’s subnet.
- CARD READER: Choose ‘ccdscanner’ and click SAVE.
- POWER BUTTON: To end the configuration and reboot cPad, click the power button.
PAPERCUT DEVICE CONFIGURATION
Device Setup
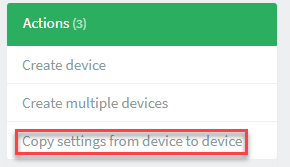
- Log into the PaperCut website: http://servername:9191/admin and go to DEVICES tab.
- In the right panel in the DEVICES tab, select “Copy settings from device to device”.
- Choose a SOURCE and a TARGET: (make sure you do NOT choose a device with ‘vL’ at the end of the name.) (choose a device that is already configured)
- If you are setting up a device that copy AND print, make sure to copy from a device doing the same thing.
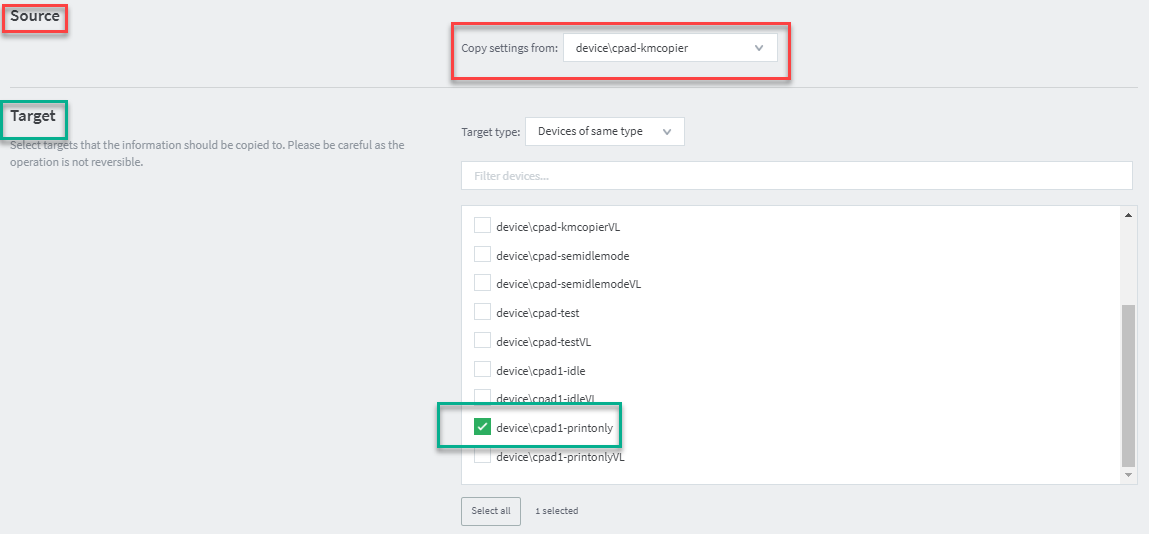
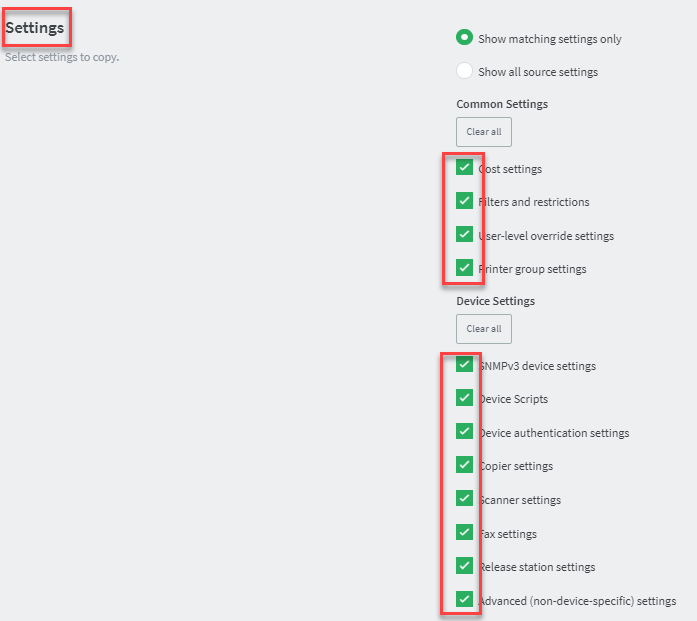
- Select all settings to COPY (choose the new device that was created):
- After you copy from ‘Device to Device’, you need to configure your Release Queue, and the “Advanced Config” section (this does not copy over).
- Go to the new Device again and under the ‘Summary’ Tab, go down to Print Release:
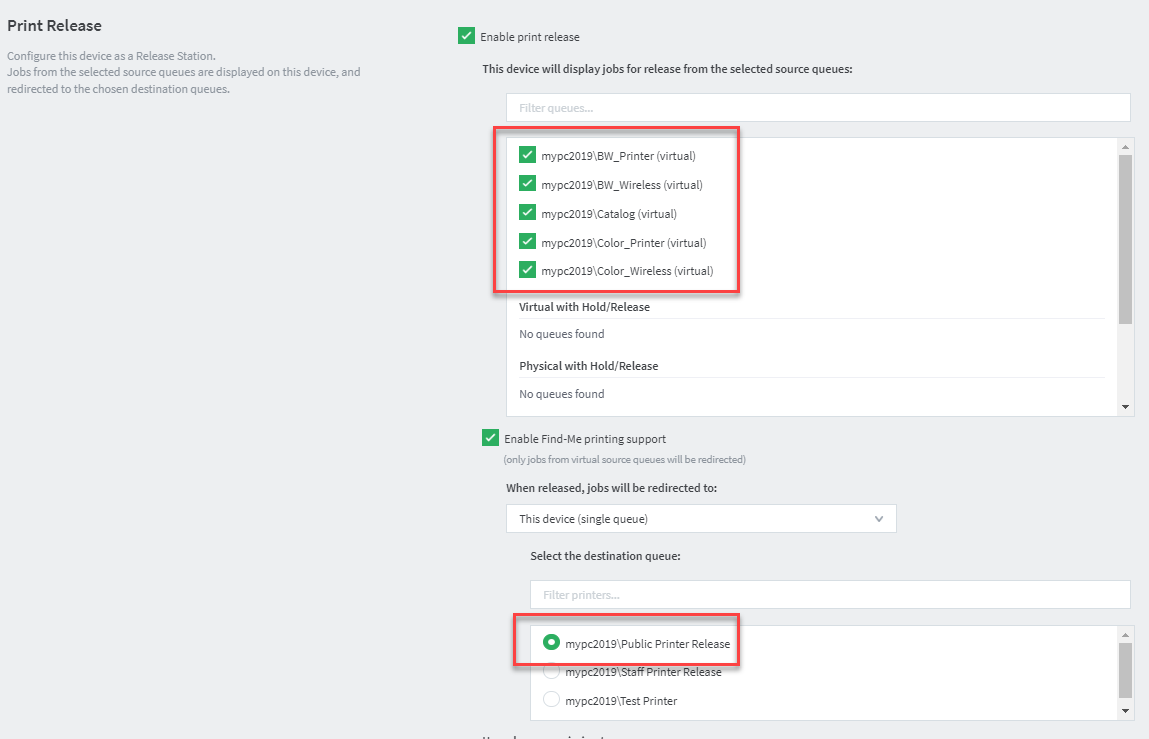
- Make sure to have your Virtual Queues selected in the top box, and then select the release queue for this location. This will be where the print job will move to so it can print where you are standing (Follow-Me Printing).
- NOTE** If did not create your release queue yet, please do that now.
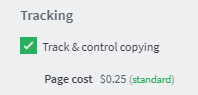
- If this device is for copying as well, make sure to configure your copy costs. (Click to edit pricing)
- Click ‘APPLY’ at the bottom of the page.
Advanced Configuration
- PAGE 1
- If you are using PaperCut balances, to stop Guest Passes from being allowed to add funds. Click on the ‘Advanced Config’ tab and Change the following options below. These will be the same for all devices. (ex: \D+ means webprint users and ^2234599.*| would be your guest pass prefixes)

- If the device is attached to a Copier, you will also want to enable CASH COPIES and configure a cash copies user under the USERS tab

- NOTE: If the Copier being used is a Konica Minolta, you will also need to set the copier make. (Shown Above)
- (click UPDATE after options, or at the bottom click UPDATE ALL)
- PAGE 2
- If allowing Papercut Balances, 'recharge-account-enabled' needs to be set to 'Y' (this is default). If you do not want to allow PaperCut balances, this needs to be set to 'N'.

- To extend the sleep timer, set this to 48800(seconds). cPads automatically reboot at 3AM so this would reset the timer as well.

- (click UPDATE after options, or at the bottom click UPDATE ALL)
- Test printing (and copying) to confirm everything is setup correctly.